In web development and design, the tools we use play a pivotal role in shaping the digital experiences we create. Figma has emerged as a powerhouse for designers, offering robust features for creating detailed UI/UX designs. On the other hand, Bricks Page Builder is gaining traction for its efficiency in building dynamic and responsive websites within WordPress. Converting designs from Figma to Bricks Page Builder can streamline your workflow, ensuring consistency and precision in your final web product. This guide will walk you through the essential steps to achieve a seamless conversion.
1. Understanding the Basics of Figma and Bricks Builder
Before diving into the conversion process, it’s important to understand the fundamental differences and compatibilities between Figma and Bricks Page Builder.
- Figma: This is a cloud-based design tool that allows for collaborative design work. It’s known for its vector graphics editor and prototyping capabilities. Figma enables designers to create interactive and high-fidelity mockups.
- Bricks Page Builder: A powerful WordPress page builder that focuses on performance and flexibility. It allows users to build custom layouts and designs without coding, using a visual drag-and-drop editor.
2. Key Benefits of Figma to Bricks Builder Conversion
Converting designs from Figma to Bricks Builder provides numerous advantages for web development teams. This process streamlines the transition from design to implementation, enhancing both efficiency and creativity.

Here are some key benefits:
- Design Fidelity: Figma to Bricks conversion maintains the integrity of the original design. Figma’s detailed layouts are accurately represented in Bricks Builder, ensuring a consistent look and feel.
- Productivity Boost: Automating parts of the coding reduces time spent on manual tasks. This allows the team to focus more on creative aspects rather than technical details.
- Responsive Design Capabilities: Bricks Builder supports responsive design, ensuring that websites look great on all devices. Its advanced features adapt the layouts seamlessly to various screen sizes.
- User-Friendly Interface: Bricks Builder offers an intuitive interface that simplifies customization. Designers can easily modify components without extensive coding knowledge.
- Flexibility and Scalability: Bricks page builder allows for easy updates and scalability of web projects. This ensures that websites can grow and evolve with changing requirements.
3. How Can We Help with Figma to Bricks Builder Conversion Services?
Our professional services offer tailored solutions for converting Figma designs to Bricks Builder, bridging the gap between creativity and technical execution.

- Expert Design Translation: Our team accurately translates complex Figma designs into Bricks Builder. This ensures that all design elements are preserved with precision, maintaining the original intent and style.
- Customized Solutions: We offer tailored solutions based on project requirements. This approach allows for flexibility and ensures that unique needs are adequately addressed.
- Enhanced Efficiency: By handling the conversion process, we enhance overall efficiency. Clients can focus on other crucial aspects of their projects while we manage the technical details.
- Quality Assurance: Our services include thorough testing to ensure the design is responsive and functions well across devices. This guarantees a hassle free, high-quality user experience.
- Ongoing Support: We provide continuous support even after the conversion is complete. This ensures that any adjustments or updates can be implemented smoothly.
Simply put, our professional Figma to Bricks Builder conversion services offer a level of expertise and personalized assistance that is unmatched by standard Figma plugins, ensuring that your web projects achieve their full potential.
Feeling Overwhelmed by the Process of Converting Figma to Bricks Page Builder?
Let our professionals take the stress off your shoulders. Our expert team specializes in seamlessly converting Figma designs into stunning, responsive WordPress websites using Bricks Page Builder.
4. Step by Step Guide to Convert Figma to Bricks Page Builder
Here are the simple steps that you can follow to easily convert your designs from Figma to Bricks page builder:
Step 1: Preparing Your Figma Design
The first step in the conversion process is to ensure your Figma design is well-prepared and organized. Begin with organizing layers and components:
- Group Similar Elements: Group related elements together to maintain structure and ease of access.
- Name Layers Clearly: Use descriptive names for layers to avoid confusion during the export process.
- Use Components: Figma’s components can be reused across your design, ensuring consistency and making it easier to replicate in Bricks.
Next, establish a grid system in Figma that mirrors the responsive grid you plan to use in Bricks Page Builder. This helps in maintaining design consistency and responsiveness.
Step 2: Exporting Assets from Figma
To transition your design elements from Figma to Bricks, you need to export the necessary assets, such as images, icons, CSS, and SVG code. Make sure to fix any issue before exporting assets.
- Select Appropriate Formats: Export images and icons in formats like PNG, SVG, or JPEG, depending on their usage.
- Optimize Images: Compress images to reduce file sizes without compromising quality. It helps enhance page load times in Bricks.
- CSS Properties: Figma allows you to inspect elements and copy CSS properties, which can be useful when styling elements in Bricks.
- SVG Code: For vector graphics, export them as SVG files to retain their quality and scalability.
Step 3: Setting Up Bricks Page Builder
With your assets ready, the next step is to set up Bricks Page Builder on your WordPress site. Install and activate the Bricks Page Builder plugin from your WordPress dashboard.
To match your Figma design perfectly, set your global styles before building.
- Go to Settings → Theme Styles in Bricks.
- Set your brand colors, fonts, heading styles, and buttons.
- Apply your typography hierarchy (such as H1, H2, and Paragraphs) to match your Figma setup.
This ensures consistency across every page you build and saves you from having to restyle elements later.
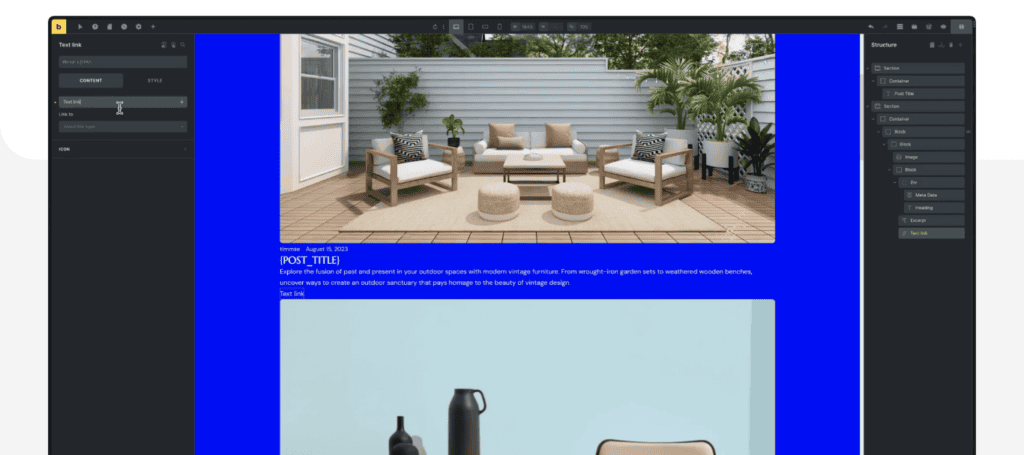
Step 4: Recreating the Layout in Bricks
Now comes the crucial part of recreating your Figma design within Bricks Page Builder.

Start with creating the structure:
- Open Bricks Builder: Go to Pages → Add New → Edit with Bricks to start building your page.
- Create Header & Footer: Build in Bricks → Templates, add your logo, menu, and footer links, then set site-wide display.
- Build Page Sections: Add Sections for Hero, About, Services, Contact, etc., and use Containers for layout structure.
- Add Elements: Drag in Headings, Text, Images, Buttons, Icons, and style them to match your Figma design.
- Adjust Layout & Spacing: Utilize the Padding, Margin, Align, and Justify settings to ensure proper alignment and spacing.
- Style & Finalize: Apply colors, backgrounds, gradients, and global styles for a consistent, polished look.
- Check Responsiveness: Preview your page on desktop, tablet, and mobile views. Adjust container direction, font sizes, and spacing for smaller screens.
Step 5: Enhancing Interactivity and Responsiveness
Ensuring your website is interactive and responsive is vital for a great user experience.

So, ensure to add interactions like:
- Hover Effects: Implement hover effects on buttons and links as designed in Figma.
- Animations: Use Bricks’ animation features to add subtle animations that enhance the user experience.
Also, test your design across different breakpoints to ensure it looks good on all devices. Lastly, make necessary adjustments in Bricks to match the responsive behavior designed in Figma.
Ultimately, thoroughly test your website before going live to ensure everything functions as expected.
- Test your site across multiple browsers to ensure its functional and offers consistent performance.
- Verify that all interactive elements, like contact forms and buttons, work correctly across browsers.
Additionally, optimize your website for speed by minimizing HTTP requests, using browser caching, and optimizing images. Finally, ensure your site is SEO-friendly by adding meta tags, alt texts, and h tags. In general, follow best practices for content structure to achieve optimal conversion results.
5. Best Practices for Project Handoff Post Figma to Bricks Conversion
After successfully converting a Figma design into a fully functional Bricks Page Builder website, the final step project handoff plays a critical role. A clean, professional handoff ensures the client or team can manage, scale, or update the site confidently without unnecessary back-and-forth. Below are essential best practices to streamline this phase.
Document the Page Structure and Layouts
Begin by creating a simple guide that outlines the structure of each page, including the use of global elements, templates, and containers. This provides clarity for anyone unfamiliar with Bricks’ visual hierarchy.
Provide Access to Global Settings and Style Guidelines
Next, share details of global colors, typography, spacing, and custom classes used. This ensures consistency if future edits are made and helps avoid accidental overrides or design mismatches.
Create a Walkthrough or Training Resource
Whether it’s a short video or a step-by-step document, include a walkthrough of how to make basic updates in Bricks, such as editing text, changing images, or managing templates. This empowers clients or team members with minimal technical knowledge.
Include Backup Files and Exported Assets
Finally, provide a backup of the Bricks template or the full WordPress site, along with exported images, SVGs, and icons used in the build. This acts as a safeguard in case of future technical issues or migrations.
By handing off your project with clear documentation and guidance, you ensure a smooth transition and long-term success for the website.
Learn more about: Designing Your UI/UX Portfolio
6. Common Mistakes to Avoid During Figma to Bricks Page Builder Conversion
Converting a design from Figma to Bricks Page Builder might seem straightforward, but it’s easy to stumble over common pitfalls that can affect performance, design accuracy, or usability. To ensure a seamless design-to-development workflow, it’s crucial to avoid these frequent mistakes during the conversion process.
Ignoring Responsive Design Early On
One of the biggest mistakes is not planning for responsiveness from the start. Figma designs may look perfect on desktop, but Bricks requires thoughtful adjustments for tablets and mobile. Always use Bricks’ breakpoints and preview modes to optimize layouts across devices.
Overlooking Global Styles and Settings
Instead of applying styles manually to every element, leverage Bricks’ global classes and theme settings. Neglecting this not only makes your workflow inefficient but also leads to inconsistencies in typography, colors, and spacing.
Using Too Many Nested Containers
Designers sometimes mimic Figma’s layers by overusing containers or divs in Bricks. However, this can lead to bloated code and slow page speed. So, aim for a clean, minimal structure wherever possible.
Not Exporting Assets Properly from Figma
Images and SVGs need to be optimized before importing into Bricks. Exporting them at incorrect resolutions or using unsupported formats can degrade visual quality and impact loading time.
Skipping Accessibility Considerations
From semantic HTML tags to proper contrast ratios, accessibility is often an afterthought. But in Bricks, you can build inclusively from the start by using meaningful tags, ARIA labels, and keyboard navigability.
Forgetting About SEO Basics
Bricks allows you to add meta tags, alt texts, and heading hierarchies. Ignoring these can hurt your site’s SEO performance even if the design looks great.
Read: Best Prototyping Tools for UI/UX Designers
To Sum Up
Converting a Figma design to Bricks Page Builder involves careful planning and attention to detail. By following these steps, you can ensure a smooth transition from design to development, maintaining the integrity of your original design while leveraging Bricks Page Builder’s powerful capabilities.
This process not only streamlines your workflow but also enhances the quality and performance of your final web product, delivering a superior experience to your users.
Need further help? Get in touch now!
Convert Figma to Bricks Builder FAQs
Can the Bricks plugin work with any WordPress theme?
Yes, the Bricks Page Builder plugin is compatible with most WordPress themes and templates, allowing seamless integration with your existing website framework.
Do I need to know how to code to convert Figma designs to Bricks page builder?
No, you don’t need to know how to code to convert Figma designs to Bricks Page Builder. Bricks Page Builder allows for drag-and-drop functionality, making it possible to recreate designs without writing any code.
What are Brick Elements, and how do they help during the conversion?
Brick elements are the fundamental building blocks within Bricks Builder. They consist of various design components such as sections, containers, text blocks, images, buttons, and more. These elements are highly customizable, allowing designers to create complex layouts and interactive web pages. During the Figma to Bricks Builder conversion, brick elements help by providing a flexible framework to replicate the design from Figma accurately.
How can I ensure that my converted website is optimized for performance?
To optimize your website’s performance, follow the conversion steps, organize components, and implement interactive elements properly.
Is there a direct way to import Figma designs into Bricks page builder?
No, there’s no methods or direct import feature from Figma to Bricks Page Builder. You would need to manually recreate the design within the builder.
What are the common pitfalls to avoid during the conversion process?
To ensure a smooth conversion process, it’s important to maintain design consistency, organize layers and components correctly, and thoroughly test the website for any break or sign that indicates any faulty functionality after conversion.