Designing websites has come a long way. With tools like Figma, creating highly customized designs is now easier than ever. However, translating these beautiful designs in Figma to WordPress websites can seem challenging, especially for those without coding knowledge. This is where SiteOrigin, a popular WordPress page builder, can make the process more accessible. It allows you to bring your Figma designs to life within WordPress without needing to dive deep into code.
Table of Contents
ToggleSteps to to Convert Figma to WordPress Using SiteOrigin
Here are the steps for converting Figma to WordPress using SiteOrigin. By the end, you’ll know how to move from a flat design in Figma to an interactive, user-friendly website on WordPress. Let’s get started!
Step 1: Export Your Figma Design
The first step in any Figma to WordPress conversion is to prepare your design. Figma allows you to create highly customizable layouts and export different elements in various formats. Here’s how to do it:
Identify Key Design Elements: Before exporting, break down your design into sections like headers, footers, buttons, images, and backgrounds. This will make it easier to build each section in WordPress later.
Export the Assets: Once you’ve identified the assets, export them by selecting the individual elements and clicking the “Export” button in Figma. You can choose formats like PNG, JPEG, or SVG, depending on the type of asset.
Save the Files: Organize your exported assets into folders for easy access later. Group them into categories like images, icons, and background elements.
Learn: Best Tips and Tricks for Figma to WordPress Conversion
Bring Your Figma Designs to Life with SiteOrigin
Our expert team can seamlessly transform your creative vision into a fully functional, responsive WordPress site.
Step 2: Install WordPress and SiteOrigin Page Builder
With your design assets exported, it’s time to set up your WordPress site and install the SiteOrigin Page Builder.
Install WordPress: If you haven’t already, install WordPress on your domain through your hosting provider. Many hosts offer one-click installations, making this process quick and straightforward.
Install the SiteOrigin Page Builder
- Go to your WordPress dashboard. Navigate to the “Plugins” section.
- Click “Add New” and search for “SiteOrigin Page Builder.”
- Install and activate the plugin.
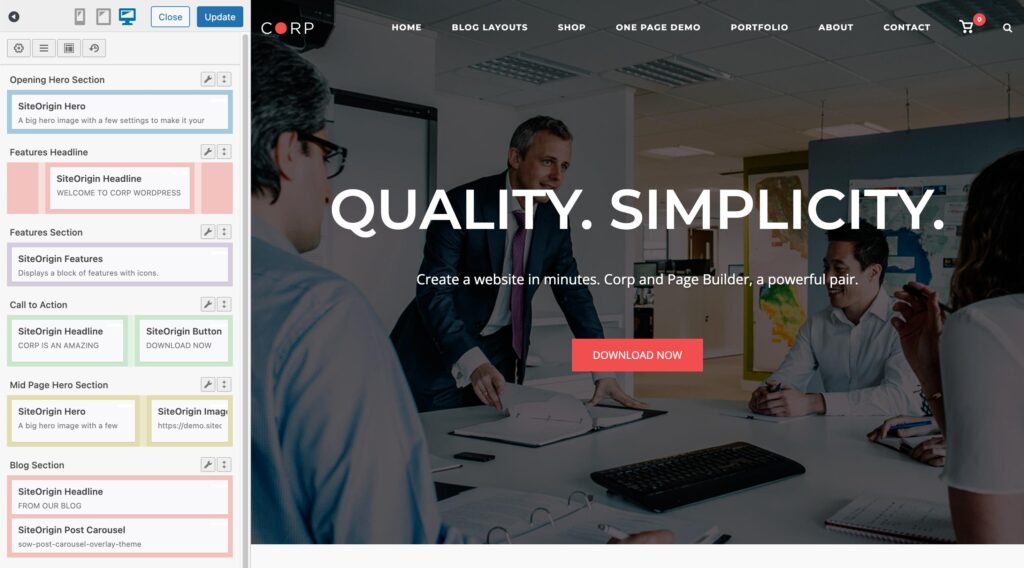
Once SiteOrigin is active, you’ll have access to its powerful drag-and-drop interface, which will make it easier to replicate your Figma design.
A Beginner’s Guide: How to Convert Figma Designs to WordPress Using Elementor
Step 3: Create the Basic Page Layout
Now that WordPress and SiteOrigin are set up, it’s time to start building the foundation of your website.

Create a New Page: From your WordPress dashboard, navigate to “Pages” and click “Add New.” Give your page a name, like “Homepage” or “Landing Page.”
Open SiteOrigin Page Builder: Once on the page editor, switch to the SiteOrigin Page Builder mode. This will allow you to create rows and columns, making it easy to organize your content.
Add Rows and Columns: Begin by adding the basic structure of your page, mimicking the layout of your Figma design. You can break your page into sections, such as header, hero image, services, testimonials, and footer. Drag and drop rows and columns as needed to replicate your design’s layout.
Check out: Best Figma to WordPress Conversion Tools
Step 4: Import Images and Backgrounds
With your structure in place, the next step is to bring in the visual elements from your Figma design.
Upload Your Images: Go to the media library and upload the images you exported from Figma. This includes logos, background images, and icons.
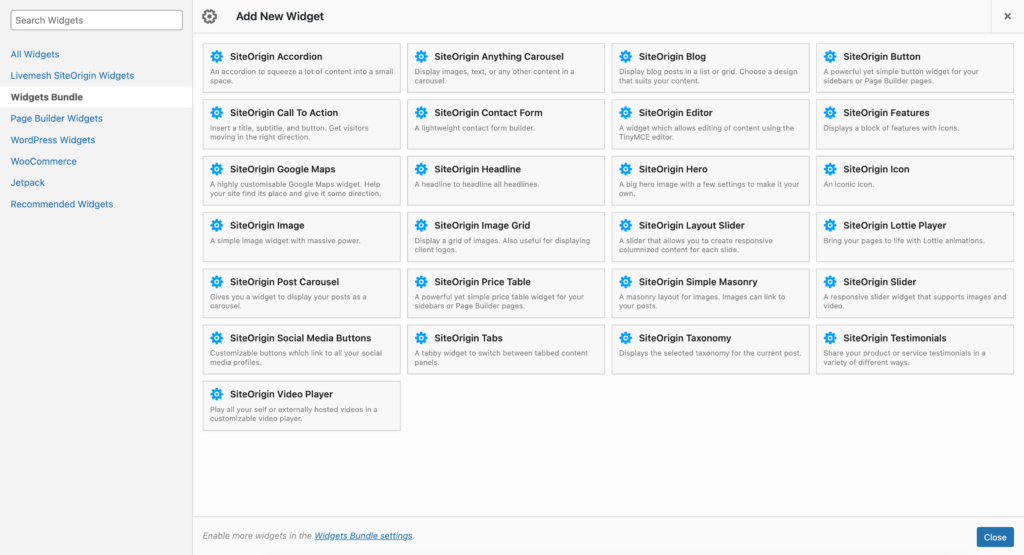
Add Backgrounds and Images to Sections: Using SiteOrigin’s “Image” widget, place images in the appropriate sections. If your design includes background images, you can add them by editing the row settings and selecting “Background Image.”
Set Image Sizes: Ensure that your images are optimized for the web. Large, high-resolution images can slow down your website, so it’s a good idea to resize and compress them before uploading.
Find out: How to Convert Figma to WordPress with Custom Animations & Microinteractions
Step 5: Style the Typography
One of the key elements in any web design is typography. Figma allows you to choose and style fonts, and with SiteOrigin, you can replicate those settings in WordPress.
Select Fonts: Choose fonts in WordPress that match the typography in your Figma design. Google Fonts can be integrated easily, and SiteOrigin supports various font options through custom CSS or by using a font plugin.
Adjust Text Sizes and Colors: Make sure the text sizes, colors, and weights align with your Figma design. SiteOrigin’s text widget allows for easy customization of fonts and text alignment.
Learn more: Figma Config 2024 Newest Features Unveiled
Step 6: Add Interactive Elements
Figma designs are static, but your WordPress website can be dynamic and interactive.

Add Buttons: Using SiteOrigin’s “Button” widget, place call-to-action buttons where they appear in your Figma design. Customize the buttons’ colors, text, and hover effects to match the original design.
Include Animations: SiteOrigin supports basic animations, such as fade-ins or slide-ins. Adding subtle animations can make your website feel more engaging and interactive.
Integrate Forms: If your Figma design includes contact forms, use a plugin like WPForms to add forms that are fully functional.
A Complete Guide: Maintaining Figma Animations in WordPress
Step 7: Optimize for Mobile
Mobile responsiveness is crucial for any website today. Luckily, SiteOrigin helps make your website responsive without much effort.
Check Mobile View: Once you’ve built your website, preview it on mobile devices. You can do this directly from the WordPress customizer by selecting the mobile view option.
Adjust for Mobile: If necessary, tweak the padding, margins, and font sizes to ensure everything looks good on smaller screens. You can use SiteOrigin’s built-in options to hide or show certain elements based on the screen size.
Learn about: Design Accessibility While Translating Figma Designs to WordPress
Step 8: Publish Your Site
After ensuring your website looks great on both desktop and mobile, it’s time to go live.
Preview the Website: Before publishing, preview the entire site. Check for any discrepancies between the Figma design and the WordPress version, making final adjustments as needed.
Publish: Once you’re satisfied, click the “Publish” button, and your Figma-to-WordPress website will be live for the world to see.
Read: How to Maximize SEO Performance in Figma to WordPress Conversions
Conclusion
Converting Figma designs into a WordPress website using SiteOrigin is a straightforward process that empowers even non-developers to bring their designs to life. By following the steps outlined in this guide, you can create a fully functional, responsive website that mirrors your original Figma design.
SiteOrigin’s drag-and-drop functionality and customizable widgets make it easy to achieve pixel-perfect layouts, ensuring that your website is both visually stunning and easy to use.
Whether you’re a designer looking to translate your creative work into a website or a business owner wanting to build a customized website, SiteOrigin simplifies the process of going from design to development. So, get started today and watch your Figma designs become interactive WordPress websites!
FAQs About Figma to WordPress Using SiteOrigin
Can I convert any Figma design into a WordPress website?
Yes, you can convert any Figma design into a WordPress website using SiteOrigin. However, complex animations or highly interactive elements may require additional plugins or custom coding. Contact us.
Do I need coding skills to use SiteOrigin?
No, SiteOrigin is designed for users without coding knowledge. Its drag-and-drop editor makes it simple to build websites without writing code.
Is SiteOrigin free?
Yes, SiteOrigin offers a free version with many features. There’s also a premium version with additional functionalities.
How can I make sure my website is mobile-friendly?
SiteOrigin automatically makes websites responsive, but you can fine-tune the mobile experience by adjusting margins, padding, and font sizes in the mobile view settings.
Can I add animations using SiteOrigin?
Yes, SiteOrigin allows you to add basic animations like fade-ins and slide-ins to make your website more dynamic.


