The seamless transition from Figma design to WordPress implementation is crucial in web development. Designers often use tools like Figma to craft eye-catching and functional user interfaces. Meanwhile, developers frequently turn to WordPress to bring these designs to life on the web. One contemporary design trend that’s gaining momentum in this space is neumorphism, also known as the new skeuomorphism. This article explores how to effectively create neumorphic UI elements in Figma and bring them into a WordPress site. We’ll cover each step in detail, from design principles to practical integration, ensuring your design impresses whether viewed on a desktop or mobile device.
What Are Neumorphic UI Elements?
Before diving into the nuts and bolts of the transition process, it’s essential to understand neumorphism. Neumorphism blends concepts of skeuomorphism and flat design to create interfaces that are not only visually appealing but also intuitive.
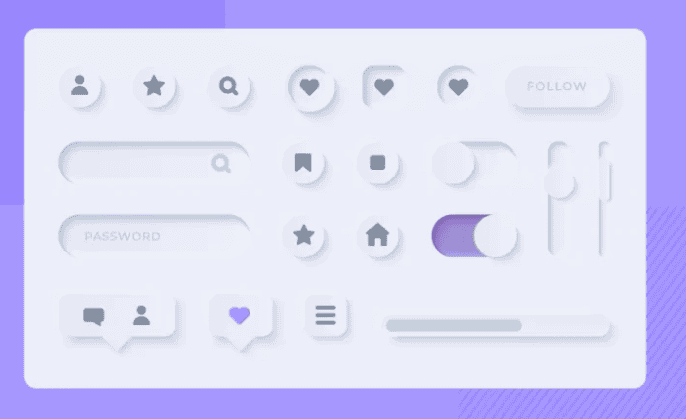
This design trend uses soft shadows and subtle gradients to create the illusion of a 3D effect, allowing elements to appear as though they are extruded or inset in the canvas.
Key characteristics of Neumorphism include:
- Soft Shadows: A prominent feature, soft shadows help distinguish elements from the background.
- Monochromatic Color Scheme: Utilizes minimal colors with subtle shifts in shade.
- Smooth Curves and Borders: Enhances the natural feel of elements.
- Minimalistic Design: Focuses on simplicity and clarity.
Figma to WordPress Services: How We Can Help and What We Offer
Our team excels in converting your Figma designs into pixel-perfect WordPress sites, ensuring every detail is captured accurately. We ensure your WordPress site matches your Figma design precisely, maintaining the visual integrity of your project. Our conversion process also incorporates best practices for responsive design, ensuring your website looks great on all devices.
Custom Theme Development
We develop custom WordPress themes tailored to your design needs, enhancing both aesthetics and functionality.
- Theme Customization: We customize existing themes to align with your unique design requirements, offering flexibility and creativity.
- Feature Integration: Our team integrates essential features, such as custom widgets and plugins, to enhance site functionality.
Neumorphic Design Implementation
Neumorphism is increasingly popular, and we specialize in implementing this elegant design style within your WordPress site.
- CSS Mastery: We use advanced CSS techniques to recreate neumorphic design effects, including soft shadows and gradients.
- Performance Optimization: By optimizing these effects, we ensure your site remains fast without compromising on visual quality.
Quality Assurance and Testing
Rigorous testing is key to ensuring a flawless user experience on your WordPress site.
- Cross-Browser Testing: We test your site across all major browsers to ensure consistent performance and appearance.
- User Testing: Our team conducts thorough user testing to identify and rectify any potential usability issues before launch.
Ongoing Support and Maintenance
Keeping your WordPress site updated and secure is paramount. We provide comprehensive support and maintenance services.
- Regular Updates: We ensure your WordPress installation, themes, and plugins are up to date, enhancing security and functionality.
- Technical Support: Our support team is available to address any technical issues and provide guidance on site enhancements.
By choosing our Figma to WordPress services, you are opting for expertise and dedication to delivering a high-quality, responsive, and visually stunning website.
Turn Your Designs Into a Digital Fiesta!
Contact us now and watch your site come to life with style, flair, and a sprinkle of quirky fun. Let’s get this digital fiesta started!
- Get in Touch
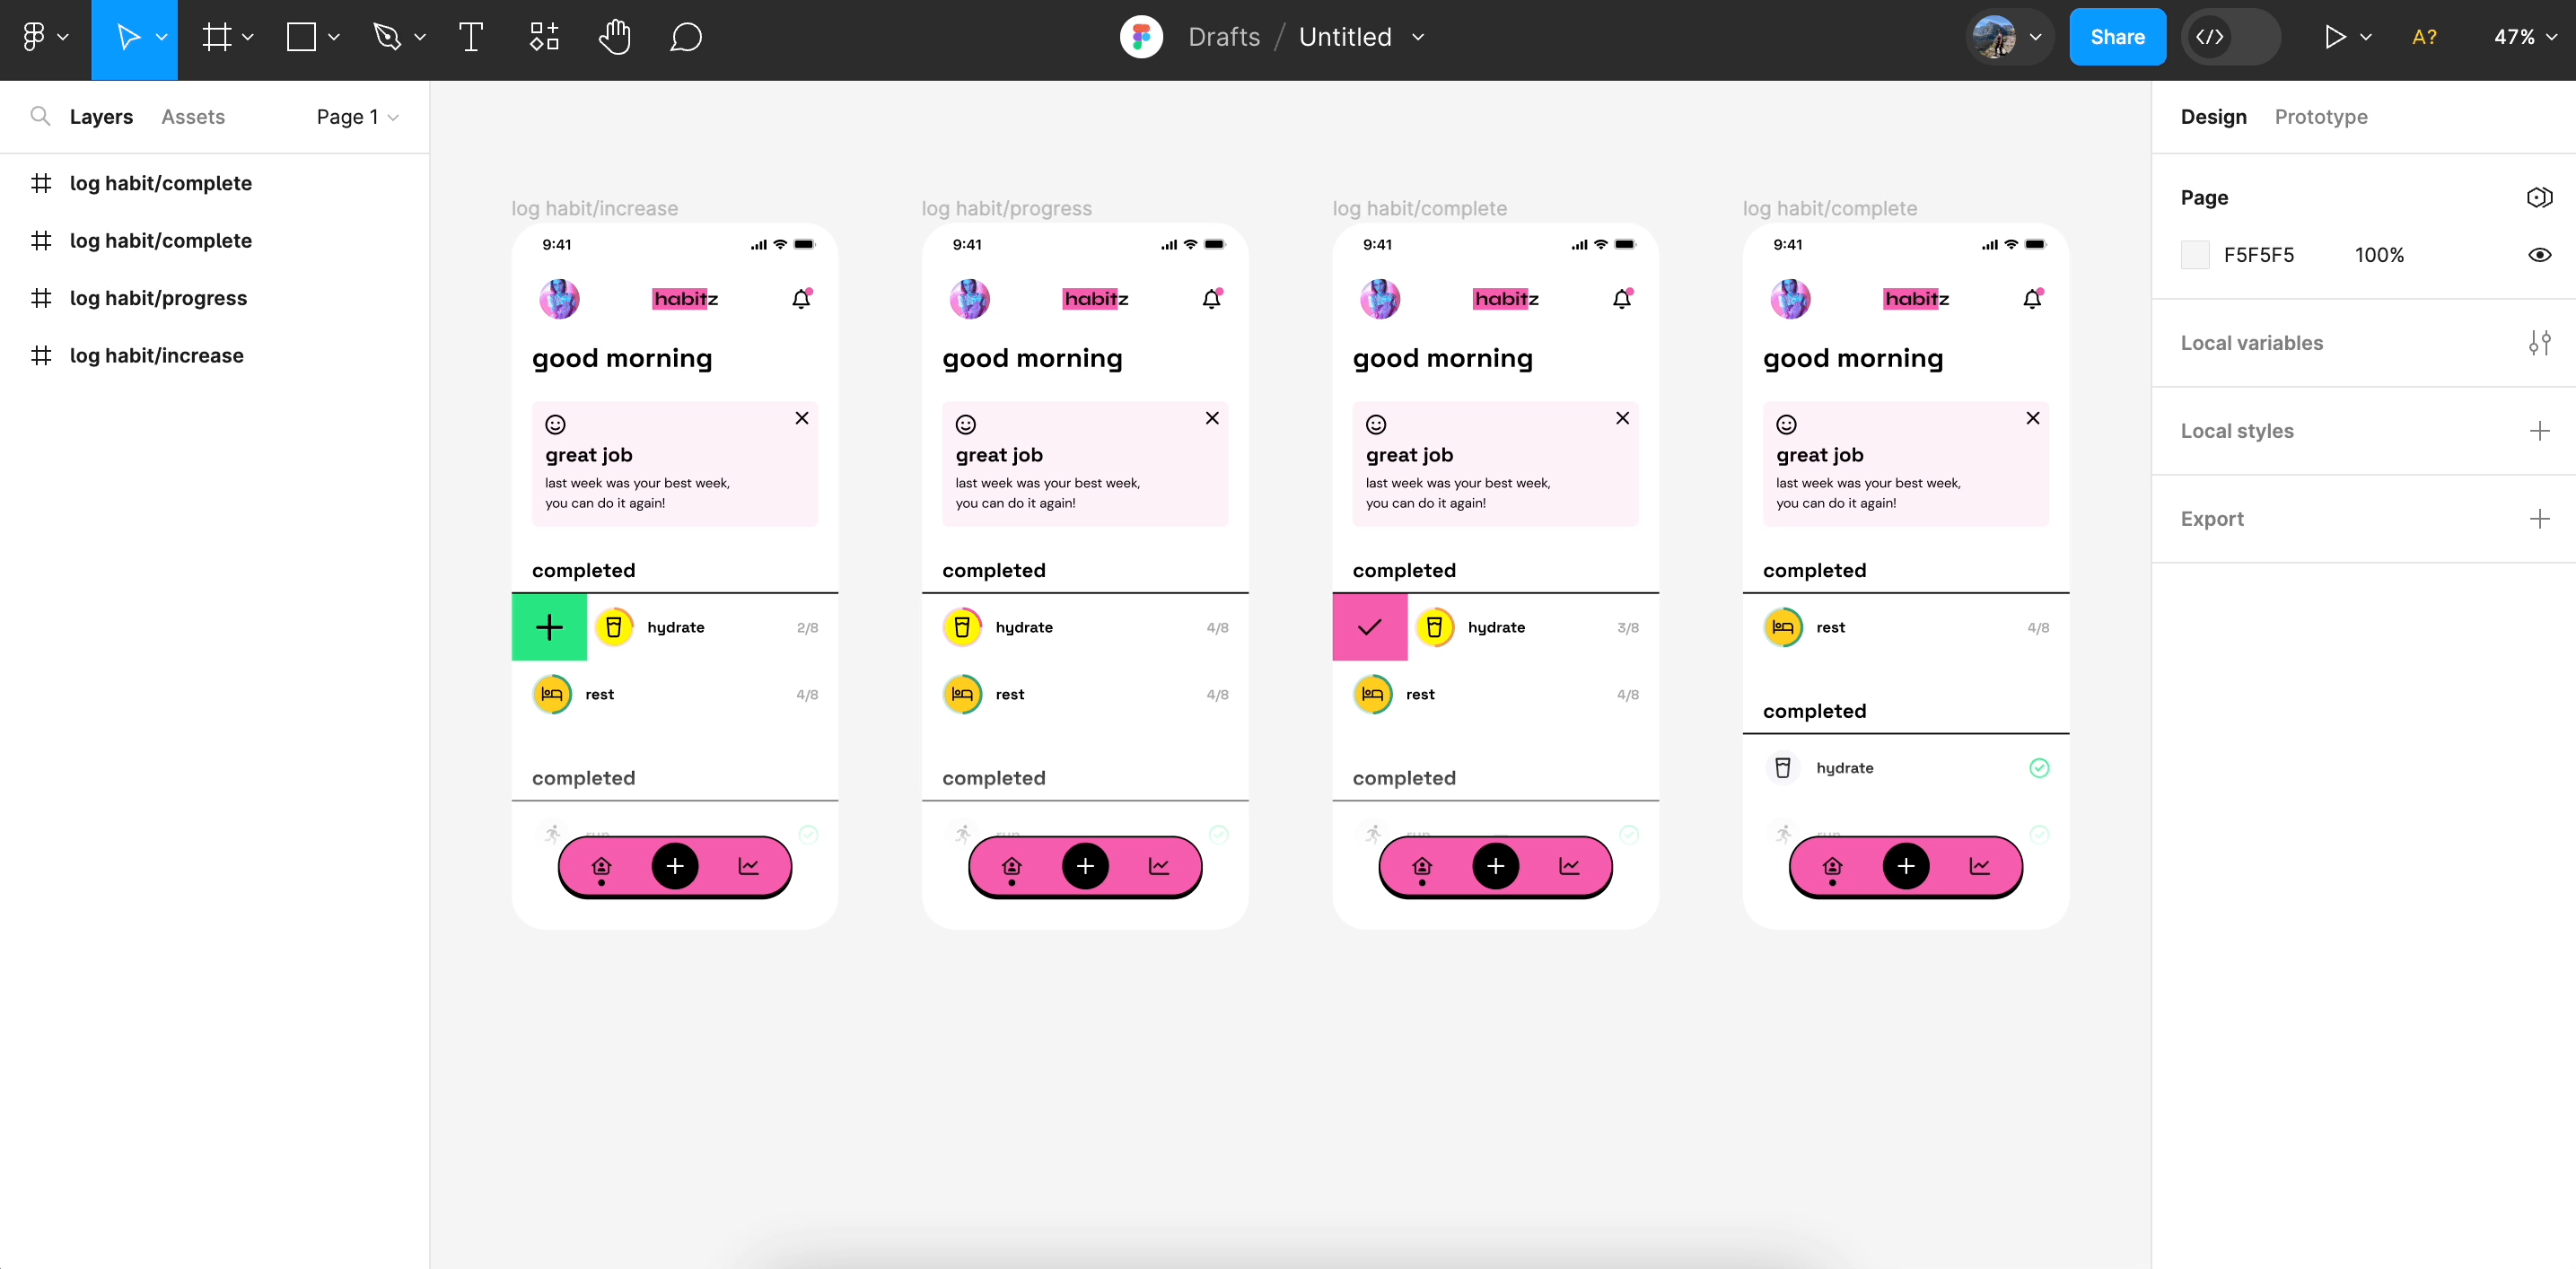
Designing Neumorphic Elements in Figma
Figma is an excellent tool for creating neumorphic designs due to its robust feature set and ease of use. Below is a step-by-step guide to crafting neumorphic UI elements in Figma.
Step 1: Setting Up Your Canvas
Start by opening Figma and creating a new design file. Choose a muted palette focusing on shades that will highlight the 3D effect. Next, set the frame size. Typically, use standard dimensions like 1920×1080 for desktop and adaptive sizes for mobile.
Step 2: Crafting Basic Shapes
Use the shape tool to draw rectangles, circles, or other basic shapes that will form your UI elements. Next, select a base color for your shape. This should be a light or neutral shade that complements your overall design theme.
Step 3: Adding Neumorphic Effects
Create shadows by duplicating your shape and changing its color to slightly darker than the base. Set the blur to achieve a soft appearance. Next, add an inner shadow with a lighter color tone, shifting slightly from the base color. Also, make use of border-radius. Use rounded corners to enhance the smoothness and continuity of the design.
Example: A neumorphic button would have a light gray base, with a darker gray shadow to the bottom right and a lighter inner shadow at the top left.
Step 4: Prototyping Interactions
Use Figma’s prototyping tools to simulate interactions like clicking or hovering. These interactions highlight the UI’s responsiveness and depth.
Read: Best Prototyping Tools for UI/UX Designers
Implementing Neumorphic Design in WordPress
Once your design is ready in Figma, the next step is translating it into a WordPress environment. This involves both front-end coding and WordPress theme management.
Step 1: Exporting Assets
Export your UI components from Figma into compatible formats (like SVG or PNG) for use in WordPress. Make sure the file sizes are web-optimized to ensure quick loading times on your website.
Step 2: Setting Up WordPress Environment
Ensure your WordPress installation is up and running. Ideally, use a customizable theme that allows for easy styling and incorporation of custom CSS.
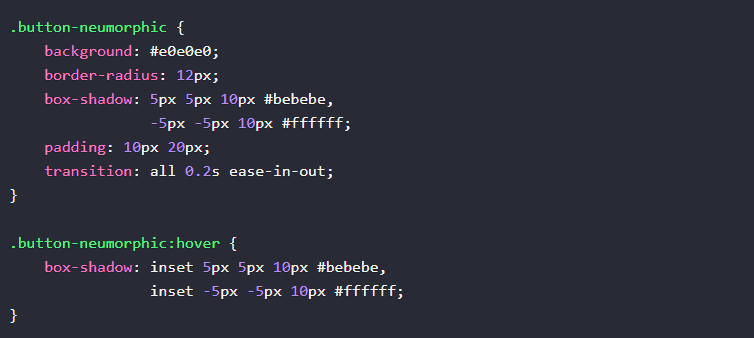
Step 3: Writing Custom CSS
Neumorphic design significantly relies on CSS to render its effects, such as shadows and gradients. Below is a sample CSS code for a neumorphic button:
Step 4: Integrating with WordPress
Integrate your custom CSS into the WordPress theme. This can be done through the theme customizer or by editing the theme’s stylesheet directly. Next, use the WordPress editor or a page builder to implement HTML elements that match the structure defined in Figma.
Step 5: Testing and Optimization
Ensure your design looks consistent across different browsers. Test your neumorphic elements on various screen sizes to ensure they adapt well.
Learn more: Benefits of Using Figma for WordPress Web Design
Conclusion
Creating neumorphic UI elements and transferring them from Figma to WordPress is a comprehensive process that requires attention to both design and technical implementation. Neumorphism offers a fresh, engaging look that enhances user interaction by appearing tactile and intuitive.
By following the steps outlined in this guide, you can seamlessly integrate unique visual elements into your WordPress site while maintaining performance and accessibility. The key to success in this endeavor is paying close attention to detail—from the shadows in your Figma design to the precise CSS implementation in WordPress.
FAQs About Neumorphic UI Elements
What is the main benefit of using neumorphic design?
Neumorphism creates visually appealing and intuitive interfaces that appear tactile. This enhances the user’s experience by making digital elements appear more interactive and engaging.
Can I use neumorphic design on all types of websites?
While neumorphism can enhance many websites, it’s best used in specific scenarios that benefit from its aesthetic, such as portfolio sites or applications. For text-heavy sites, traditional flat designs may be more suitable.
Is it necessary to use a particular WordPress theme for neumorphic design?
No, but using a customizable theme will make it easier to implement custom CSS and achieve the desired neumorphic effect.
How do I ensure my neumorphic design is responsive?
Use Figma’s prototyping tools to test how your design scales on different devices. In WordPress, utilize responsive design practices, such as flexible grid and media queries, to ensure adaptability.
Does neumorphism affect website performance?
Neumorphic design relies heavily on CSS shadows and can increase rendering load if not optimized. Optimize your design by avoiding excessive shadow layers and ensuring graphics are web-friendly.