Creating and editing logos in Figma is a fantastic way to harness the power of this cloud-based design tool. Whether you’re designing a logo from scratch or tweaking an existing one, Figma offers an intuitive interface and powerful features. Here’s a detailed guide on how to handle your Figma logo design effectively.
Key Takeaways
- Start with a tidy workspace in Figma by creating a Frame and organizing layers for an efficient design process.
- You can add logos by importing existing files, creating from scratch with shape tools and the Pen tool, or using vector networks for more complex designs.
- Customize your logo via editing shapes, applying color variables, and adjusting typography to match your brand, and use advanced tools like Boolean operations and alignment for a polished finish.
Setting Up Your Figma Workspace
Before starting the creative process, organizing your workspace in Figma is key for efficiency and clarity. A tidy workspace significantly streamlines your design process.
- Create a New Project: Open Figma and click on the “New File” button to start a new design project. Name your file appropriately, for example, “Logo Design.”
- Set Up Your Artboards: Click on the “Frame” tool (F) and create an artboard. It’s helpful to start with common dimensions for logos, like 500×500 pixels, but you can adjust them based on your needs. Create multiple artboards if you want to iterate on different versions or variations of the logo.
- Layers and Pages: With your Frame ready, organize your elements using Layers and Pages. Layers help manage individual design components efficiently. Rename, reorder, and group layers to maintain a clutter-free workspace.
Additionally, Figma’s customizable workspace allows for arranging panels and tools to suit your preferences, ensuring all design elements are easily accessible.
Read: Redesign or Design Update
Adding a Logo to Your Figma Design
With your workspace set up, you can now add logos to your design that were created to fill using Figma. Figma offers several methods, each catering to different needs and preferences. Whether importing an existing logo, creating a new one from scratch, or using vector networks, Figma provides robust options. Explore these methods to find the best approach for your project.
Importing an Existing Logo
Importing an existing logo into Figma is simple. Navigate to the ‘File’ menu and select ‘Place Image’ to import various file formats like SVG or PNG.
- After importing your logo, resize it using the handles at the corners of the bounding box.
- Position it precisely using the Properties panel to set the X and Y coordinates.
This method is ideal for integrating logos designed in other tools like Illustrator into your Figma project.
Editing an Existing Logo
If you want to edit an existing logo in Figma, follow these steps:
- Import the Logo: Simply drag and drop your existing logo file (SVG, PNG, etc.) directly into Figma. For vector files like SVGs, Figma allows you to ungroup and edit individual elements.
- Make Necessary Edits: Use vector editing tools to adjust paths, shapes, and colors. Modify text elements by selecting and using the “Text” tool.
- Align and Organize: Utilize the alignment tools to ensure elements are distributed evenly. Use layers to organize different logo components, making it easier to isolate and edit individual parts.
- Review and Refine: Zoom in and out to examine your logo at different sizes. Ensure it looks good on small and large scales. Seek feedback and refine your design to achieve the best result.
Learn: Role of Atomic Design in Figma to WordPress Projects
Creating a New Logo from Scratch
When creating a logo from scratch in Figma, consider the following steps:
- Research and Sketch: Before jumping into Figma, research your brand’s identity, competitors, and industry trends. Sketch out ideas on paper or digitally to explore different concepts. If you need to update an existing logo, you can directly replace the layers or components within your design.
- Using the Vector Network: Vector networks in Figma revolutionize intricate shape and design creation. Unlike traditional vector paths, they offer complex, flexible point connections. This enhanced control improves precision and ensures scalability and adaptability of your logo across various sizes and formats.
- Incorporate Shapes and Text: You can combine basic shapes from the toolbar, such as rectangles, ellipses, and polygons, to create interesting logo elements. For text-based logos, use the “Text” tool (T) to experiment with different fonts and typography. Figma supports Google Fonts and allows you to import custom fonts.
- Utilize Components: If you plan to use your logo design across multiple projects, convert it into a component. This makes updates easy and ensures consistency. Right-click on your logo and select “Create Component.”
- Add Color and Effects: Use the color picker to apply your brand colors. You can also create swatches for consistent color usage. Apply effects like shadows, blurs, or gradients using the “Effects” panel to add depth and interest.
Check out: Impact of Color Theory in Figma to WordPress Conversions
Exporting Your Logo
Once your logo design or edits are complete, exporting is straightforward:
- Select the Logo: Click on the logo or use the selection tool (V) to choose it.
- Export Settings: Go to the “Export” panel on the right sidebar. Choose the file format you need (PNG, SVG, PDF, etc.). Set your desired resolution or export at multiple scales for different use cases.
- Export: Click the “Export” button and save your logo to your device.
Know about: Responsive Design in Figma
How Brandy Helps Maintain Design Consistency in Logo Design?
Brandy is a powerful tool designed to help teams maintain design consistency. It provides a centralized style guide that integrates seamlessly with tools like Figma.
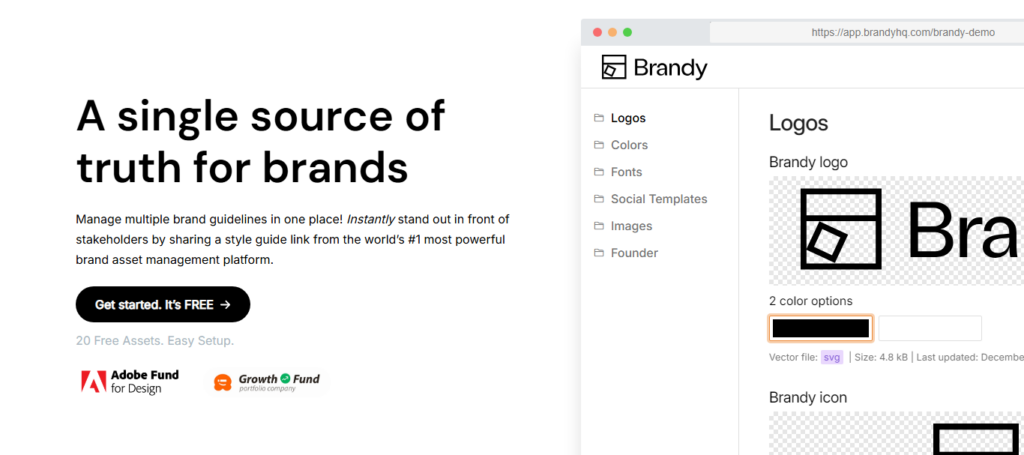
- Centralized Repository: Brandy acts as a single source of truth for all brand assets and guidelines. It consolidates color palettes, typography, iconography, and other design elements into one easily accessible location.
- Real-Time Updates: With Brandy, any changes made to the style guide are immediately reflected across all projects linked to it. This ensures that everyone on your team is using the most up-to-date version of your design elements.
- Integration with Figma: Brandy integrates smoothly with Figma, allowing you to pull your style guide directly into your design files. This integration facilitates easy application of your brand’s styles within Figma projects, ensuring consistency across all design outputs.
- Easy Access and Collaboration: Teams can access Brandy through a simple URL, which means designers and stakeholders can quickly view and discuss design standards without the need for complex software setups or training. The demo available – Brandy Figma Demo – shows how you can use Brandy to streamline your design process and efficiently manage brand consistency.
- Scalability: As your brand evolves, Brandy makes it easy to scale design guidelines by adding new elements or updating existing ones. This is particularly useful for growing teams or brands expanding their design language.
By utilizing Brandy alongside Figma, you can ensure that all design components are consistent with your brand identity, reducing the risk of discrepancies and improving the overall quality of your projects.
Find out: Why Brand Asset Management Software is Essential for Efficient Figma to WordPress Transformations
Customizing Your Logo
After adding your logo to Figma, the next step is customization. This ensures it aligns with your brand’s identity and stands out. Figma offers numerous options, from editing shapes and components to applying color variables and adjusting typography. Explore these customization techniques to make your logo truly unique.
- Editing Shapes and Components: Editing shapes and components in Figma is straightforward. Double-click on a shape to access its properties and customize aspects like opacity and blend mode directly in the properties panel. For logos imported from external files, resize and reposition them easily using the Properties panel. This flexibility ensures all elements are perfectly aligned and proportionate, enhancing the overall design.
- Applying Color Variables: Color is a crucial element of any logo. In Figma, add custom fill color variables via the Variables Panel using the ‘Create Variable’ feature. These ensure consistent color themes across projects and can be easily updated if needed. Link color variables to different layers to maintain uniformity throughout your design.
- Typography Adjustments: Typography plays a significant role in logo design. Figma’s Batch Styler Plugin is excellent for selecting and customizing multiple text styles. The Batch Styler Plugin allows quick application and management of different fonts and styles across layers, enhancing your logo’s overall look and flexibility.
Read: Unlimited Figma to WordPress Conversions for Busy Digital Agencies
Advanced Techniques for Figma Logo Design
To elevate your logo design, Figma offers several advanced techniques. These tools refine your design and add a professional touch. Boolean operations, alignment tools, and exporting in optimal formats ensure your logo is visually appealing and functional.
- Boolean Operations: Boolean operations in Figma allow combining or subtracting shapes to create complex designs. For example, the union operation merges shapes into a single entity, while subtracting removes overlapping areas. After Boolean operations, flattening shapes maintains a clean vector output, ensuring your logo remains scalable and sharp at any size.
- Aligning Elements: Alignment tools in Figma ensure visual harmony in your logo design. They help precisely position logo components, maintaining consistency throughout the design. Using the alignment panel, center elements both horizontally and vertically. This enhances visual appeal and ensures functional coherence.
- Exporting Your Logo: Exporting your logo in the right format is crucial for maintaining its quality. The optimal format for logos in Figma is SVG, ensuring scalability and high-quality resolution. Ensure your logo is in SVG format for the best quality, especially if you plan further edits in Figma or other design tools. This format keeps your logo sharp and clear at any size.
Expert Guide: How to Integrate Figma Interactive Components into WordPress
Practical Tips for Efficient Figma Logo Design
To wrap up, here are practical tips to enhance your logo design process in Figma. These include utilizing shortcuts, organizing layers, and collaborating effectively with clients. Mastering these techniques will improve your logos’ visual appeal and streamline your workflow, making the design process more efficient and enjoyable.
- Utilizing Shortcuts: Keyboard shortcuts in Figma can drastically reduce time spent on repetitive tasks. For example, ‘Cmd/Ctrl + D’ duplicates layers, and ‘Cmd/Ctrl + G’ groups them. Shortcuts enhance design speed by providing quick tool access without navigating menus. This approach can make your workflow much more efficient.
- Organizing Layers: Organizing layers in Figma is essential for managing complex designs. Group layers together to maintain a structured workspace, making it easier to edit and manage components. Consistent naming conventions enhance project organization and facilitate easier team collaboration.
- Collaborating with Clients: Figma’s real-time collaboration features are transformative for client work. Invite collaborators to give feedback or add content directly within the design. Clients can leave feedback directly on the design using commenting features, facilitating clearer communication and improving the feedback loop.
Check out: How to Design Landing Pages in Figma and Launch Them on WordPress
Summary
In conclusion, mastering Figma for logo design involves setting up your workspace, adding and customizing logos, and utilizing advanced techniques. Each step contributes to creating a unique and professional logo that stands out. With the tips and techniques covered in this guide, you’re well-equipped to tackle any logo design project with confidence. Happy designing!
FAQs About Figma Logo Design
How do I import an existing logo into Figma?
Just go to the ‘File’ menu and hit ‘Place Image’ to import your logo in formats like SVG or PNG. Easy peasy!
Can I create a logo from scratch in Figma?
Absolutely, you can create a logo from scratch in Figma using its shape tools and the Pen tool for detailed designs. It’s a great way to make something unique and scalable!
What are vector networks in Figma?
Vector networks in Figma let you create more intricate and flexible paths between points, making your designs super precise and scalable. It’s a game changer for tackling detailed design work!
How can I ensure color consistency in my logo designs?
To keep your logo designs looking consistent, use custom color variables in Figma that you can link to layers for easy updates across projects. This way, you’ll maintain that cohesive look every time!
What format should I use to export my logo from Figma?
For exporting your logo from Figma, go with SVG; it keeps your design scalable and sharp no matter the size.