In web design, tools like Figma and Webflow have become essential for creating and developing modern, responsive websites. Figma allows designers to create visually appealing, pixel-perfect designs. On the other hand, Webflow provides the platform to transform those designs into fully functional websites without needing to write a single line of code. But how do you convert Figma to Webflow? This article will walk you through a step-by-step process to help you successfully bring your Figma designs into Webflow.
Table of Contents
ToggleStep-by-Step Guide to Convert Figma to Webflow
This guide will help you build a Webflow site that mirrors your Figma design with accurate structure, styling, and responsiveness.
Step 1: Prepare Your Figma Design
Before diving into the actual conversion, ensure that your Figma design is well-organized and optimized for development. This involves checking a few essential elements:
- Layout Consistency: Ensure consistent spacing, typography, and grid systems across all pages.
- Design Components: Group related elements such as buttons, cards, and other components. This will make it easier to transfer them to Webflow.
- Exportable Assets: Make sure that all images, icons, and other assets are exportable. In Figma, you can mark assets as exportable by selecting them and clicking the export button in the right-hand sidebar.
This preparation will save time when replicating the design in Webflow and ensure that everything is aligned properly.
Guide to: Converting Figma Designs to HTML Code
Step 2: Set Up Your Webflow Project
Once your Figma design is ready, it’s time to set up your Webflow project.

- Create a New Project: In Webflow, log in to your account and click the “Create New Project” button.
- Choose a Blank Template: Since you will be manually recreating your Figma design, start with a blank template. This allows for full customization without any pre-set elements getting in the way.
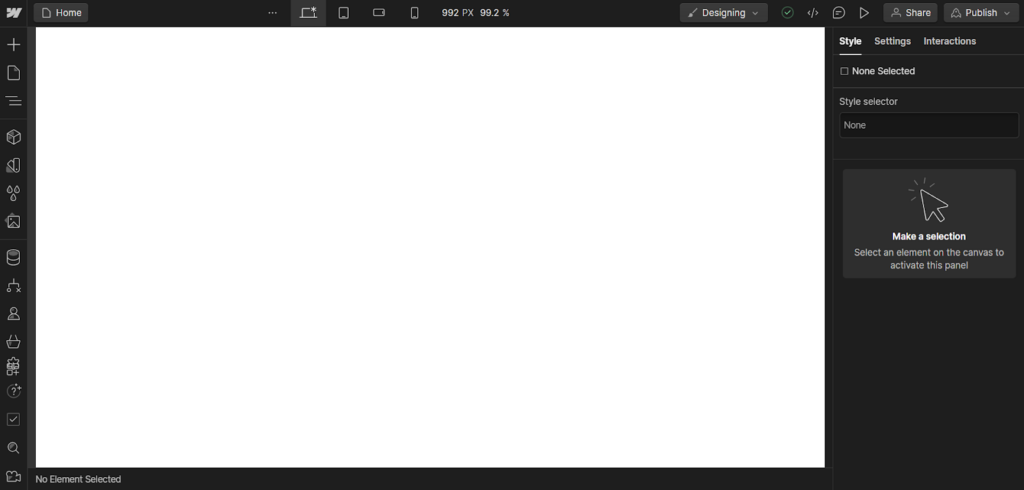
- Define Global Styles: Begin by setting up your global styles, such as typography, colors, and spacing. In Webflow, you can define global classes that apply to headings, paragraphs, and other elements to ensure consistency across the site.
Find out: Figma Config 2024 Newest Features Unveiled
Effortless Figma to Webflow Conversion for Pixel-Perfect Websites
Our skilled team ensures a seamless transition, delivering a pixel-perfect, responsive site that meets all your design expectations.
- Get Your Project Started
Step 3: Recreate the Layout Structure
The layout is one of the most important parts of converting your design from Figma to Webflow. Webflow uses a box model for its layout, which is based on containers, rows, and columns.
- Set Up Containers and Sections: Start by creating sections for each major part of the page (e.g., header, hero section, footer). In Webflow, each section should be treated as a “container” that holds specific content.
- Use Grids and Flexboxes: Based on your Figma design, decide whether to use the grid layout or flexbox in Webflow. For example, for a responsive gallery, the grid might be more appropriate, while flexbox is useful for aligning elements like buttons and icons.
- Replicate the Structure from Figma: Start by copying the basic structure of your Figma layout. Each container, row, or column in Webflow should map to the layout elements from Figma. This step ensures the page’s layout is consistent with your Figma design.
Read: How to Maximize SEO Performance in Figma to WordPress Conversions
Step 4: Add and Style Elements
After laying down the structure, it’s time to add elements like text, images, buttons, and icons.
- Text and Headings: Use Webflow’s text elements for all the textual content in your design. You can copy and paste the text from Figma into Webflow. Apply your global typography styles to headings (H1, H2, H3, etc.) and body text to maintain consistency.
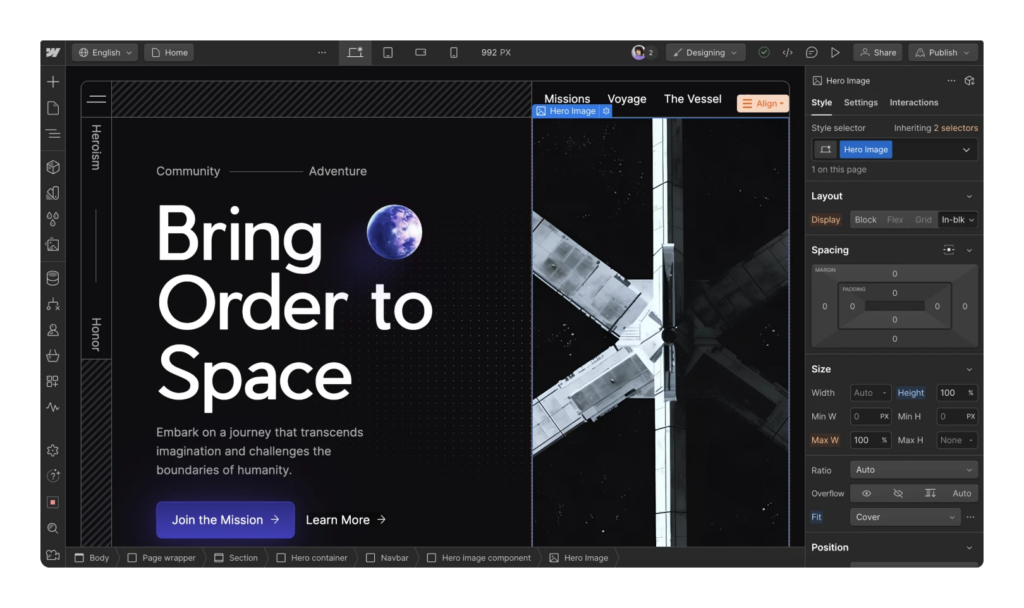
- Buttons and Forms: Add buttons and form elements according to your Figma design. Be sure to create new classes for buttons to ensure they have the right padding, color, and hover effects.
- Images and Icons: Export all images and icons from Figma (usually in PNG, SVG, or JPG format). Then, upload these files into Webflow and place them in the corresponding positions based on your design.
Know more about: Design Accessibility in Figma Designs to WordPress
Step 5: Implement Interactions and Animations
If your Figma design includes any hover effects, transitions, or interactions, Webflow makes it easy to add these.
- Simple Hover Effects: To add a hover effect, select the element (such as a button) and go to the “Interactions” panel. You can define a hover interaction that changes the color, opacity, or even moves the element slightly.
- Page Transitions and Scroll Effects: If your design includes page load animations or scroll-triggered animations, Webflow allows you to create these without code. In the “Interactions” panel, you can add page triggers or scroll animations to bring your site to life.
- Smooth Animations: Webflow provides pre-built animations that you can apply to elements like fade-ins, slide-ups, or zoom effects to replicate any interactive features from your Figma design.
Check out: How to Convert Figma to WordPress with Custom Animations & Microinteractions
Step 6: Ensure Responsiveness
Figma designs are often created for desktop views, but Webflow allows you to make your site responsive across various screen sizes, including tablets and mobile devices.
- Adjust Layout for Mobile: Switch to Webflow’s mobile view to see how your design adapts to smaller screens. You may need to adjust the width of containers and font sizes or hide certain elements that are not necessary for mobile.
- Use Webflow’s Breakpoints: Webflow offers multiple breakpoints for mobile, tablet, and desktop views. Make sure each version of your site looks good by adjusting the layout and element positions accordingly.
- Test on Different Devices: Preview your design on various devices to ensure that everything looks just as polished as it does on the desktop version.
Step 7: Add SEO and Meta Information
Now that your site is functional and responsive, you need to optimize it for search engines and accessibility.
- Add Alt Text to Images: Ensure all images and icons have descriptive alt text to improve accessibility and help with SEO.
- Set Page Titles and Descriptions: Under Webflow’s “Page Settings,” add a title and meta description for each page. These are essential for SEO and help search engines understand what your site is about.
- Optimize Page Load Speed: Use Webflow’s built-in tools to ensure your site loads quickly. Compress images, remove unnecessary elements, and ensure interactions do not cause performance issues.
Learn about: How to Optimize Figma Designs for WordPress Page Speed and Performance
Step 8: Publish Your Site
Once you’re satisfied with the design and functionality, it’s time to publish your site. Preview your entire site and navigate through all pages to ensure everything works smoothly. When you’re ready, click the “Publish” button to deploy your website live on Webflow’s hosting. You can also connect your custom domain if needed.
To Sum Up
Converting Figma to Webflow may seem challenging, but it can be a seamless process with the right approach. By following this step-by-step guide, you can successfully bring your Figma designs to life on Webflow, ensuring that your site is not only visually stunning but also responsive and easy to maintain. Whether you’re working on a personal project or a client website, mastering this manual conversion process will empower you to create professional, high-quality websites.
FAQs About Figma to Webflow
Can I convert any Figma design to Webflow?
Yes, Webflow can handle most design elements created in Figma. However, the complexity of the design and interactivity will determine how much manual adjustment is needed.
Do I need coding skills to convert Figma to Webflow?
No coding skills are required. Webflow allows you to create and manage websites visually, although some understanding of basic web design principles can be helpful.
How do I export assets from Figma to Webflow?
You can mark images, icons, and other assets as exportable in Figma. Afterward, export them in the desired format (PNG, SVG, etc.) and upload them into Webflow.
How long does it take to convert a Figma design to Webflow?
The time varies depending on the design’s complexity and the user’s experience. For simple designs, it may take a few hours, while complex designs may take a day or more. Contact us for more details.
Is Webflow responsive by default?
Yes, Webflow sites are responsive, but you may need to make specific adjustments for different breakpoints to ensure the design looks good across all devices.


