Transitioning designs from Figma to WordPress can often feel daunting, especially for non-developers or those without coding experience. Fortunately, Visual Composer simplifies this process, enabling you to bring pixel-perfect Figma designs to life in WordPress.
This guide will walk you through the steps and best practices to convert Figma designs into responsive, accurate WordPress websites using Visual Composer, a powerful drag-and-drop page builder.
In this guide, you’ll learn the basics, preparation steps, conversion techniques, optimization tips, and more to ensure a smooth Figma-to-WordPress workflow. Whether you’re a designer looking to make your designs more functional or a non-coder interested in creating WordPress sites, this guide is for you.
Table of Contents
ToggleWhat is Visual Composer?
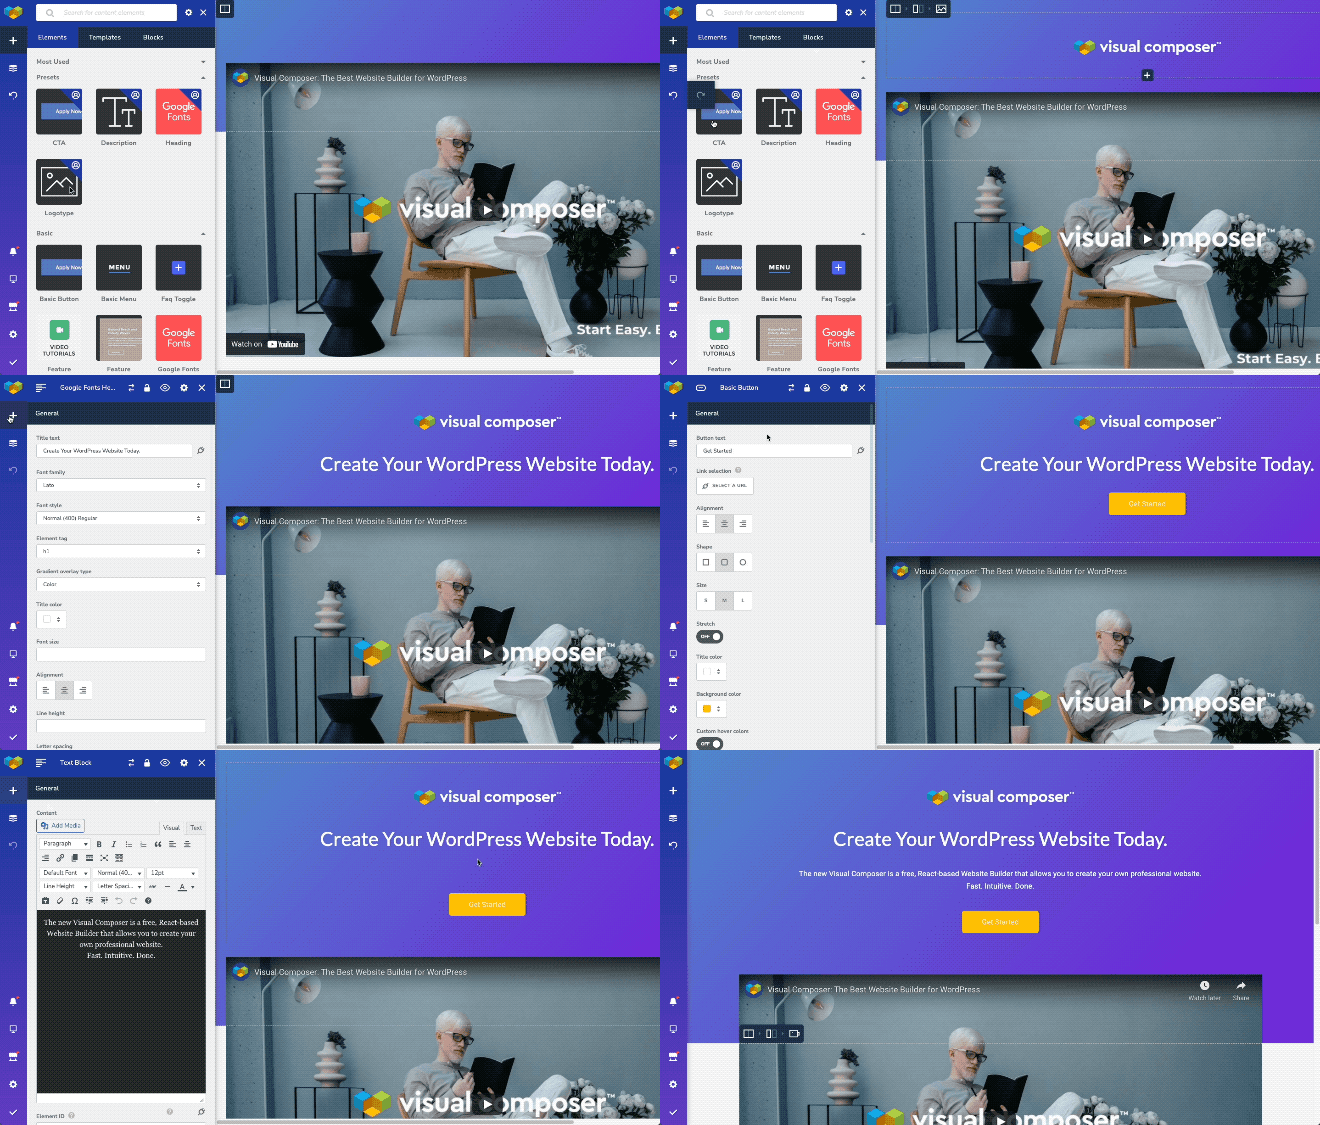
Visual Composer is a WordPress website builder known for its intuitive drag-and-drop editor. This tool allows users to create complex layouts, add content elements, and style pages without writing a line of code. Visual Composer is especially useful for transforming Figma designs into WordPress websites, as it offers design flexibility and compatibility with various themes.

Benefits of Using Visual Composer for WordPress Sites
- User-Friendly Interface: Perfect for non-developers and beginners.
- Responsive and Mobile-Ready: Ensures that websites look good on all devices.
- Customizable Elements: Comes with a wide range of design elements, from text boxes and buttons to animations and forms.
- Real-Time Editing: Enables live editing so you can see changes instantly.
Advantages of Converting Figma Designs to WordPress Using Visual Composer
Converting Figma designs into WordPress websites with Visual Composer offers several advantages:
- Speeds Up Development: The drag-and-drop functionality minimizes time spent on layout building.
- Ensures Design Accuracy: Visual Composer’s precision tools allow you to match your Figma design closely.
- Low-Code Approach: For designers without coding skills, Visual Composer makes development accessible.
- Responsive Layouts: Easily adjust the design to be mobile and tablet-friendly, saving time on responsive adjustments.
Read: Key Steps in Figma to WordPress Conversion
Feeling Overwhelmed? ???? Our Team of Figma to WordPress Gurus is Just a Click Away.
Whether you’re grappling with complex layouts or just need a little extra guidance, our expert team is here to help!
- Let’s Talk
Preparations Before Starting Figma to WordPress Conversion
Before you begin converting your Figma design to WordPress, complete the following preparatory steps for a streamlined experience.
Setting Up in Figma
- Organize Files and Assets: Create folders and group elements in Figma for easy access.
- Use Auto Layout: Apply auto layout to sections for responsive-friendly designs.
- Export Assets Properly: Export all images, icons, and graphics in formats like JPEG, PNG, or SVG, depending on quality and scalability needs.
Setting Up in WordPress
- Choose a Compatible Theme: Pick a theme that works well with Visual Composer to avoid layout conflicts.
- Install Visual Composer: Download and activate the Visual Composer plugin in WordPress.
- Configure Basic Settings: Adjust settings within Visual Composer to align with your project needs, such as defining global fonts or color palettes.
Know about: Figma to WordPress Benefits
Tips for a Smooth Conversion Process
- Consistency is Key: Use Figma’s styles and components to maintain design uniformity.
- Efficient Asset Management: Export images in optimized file sizes to avoid slow loading times.
- Save Templates: Visual Composer’s templates feature can help you reuse design sections.
- Troubleshoot Common Issues: Double-check layout settings and asset uploads if something isn’t displaying correctly.
Step-by-Step Guide to Converting Figma to WordPress Using Visual Composer
Here are some quick steps to help you convert your Figma design seamlessly to WordPress. If you find these steps tedious, don’t hesitate to contact a professional for Figma to WordPress conversion.
Step 1: Analyze Figma Design Structure
Identify each section, grid, and component in the Figma design. Also, record essential design attributes like font sizes, colors, and spacing to ensure consistency.
Step 2: Set Up the Page Layout in Visual Composer
Start with a fresh page in WordPress and open Visual Composer’s editor. Next, match the layout grid from Figma by adding rows and columns.

Step 3: Add Elements to Match Figma Design
Select elements like headers, text boxes, buttons, and image blocks to recreate Figma components. Add images, icons, and media assets from your Figma export folder.For dynamic styling, add visual effects such as shadows, borders, or animations.
Step 4: Style Elements in Visual Composer
Use the same fonts, colors, and line spacing as in Figma. Also, adjust settings in Visual Composer to optimize the layout for mobile and tablet views.
Step 5: Fine-Tuning and Previewing
Visual Composer allows you to preview on multiple devices, so you can make adjustments as needed. Plus, ensure consistency with the original Figma design before publishing.
Simple Guide: How to Migrate a Site from Figma to WordPress
Testing and Optimizing the Converted Design
To ensure a seamless user experience, test the design on different browsers and devices using tools like BrowserStack. Next, check SEO, website performance, and accessibility.
- SEO and Performance Optimization: Use plugins like Smush to reduce image file sizes without losing quality. Also, optimize alt tags and schema markup, i.e., properly label images and structure content for SEO.
- Accessibility Considerations: Ensure readability with accessible color contrast and text size. Also, add descriptive alt text to images and button labels for improved accessibility.
Find out: Best Tips and Tricks for Figma to WordPress Conversion
After converting and testing your design, publish the page on your WordPress site. Visual Composer’s live editor makes updating or editing the page easy over time. To maintain your design in the long term, regularly update WordPress, Visual Composer, and any associated plugins.
Conclusion
Converting Figma designs to WordPress using Visual Composer streamlines the process for designers and non-coders alike, delivering responsive, visually accurate sites. By following this guide, you can confidently bring your Figma creations to life on WordPress. So, start experimenting with Visual Composer and explore the endless possibilities for making your designs functional and accessible.
FAQs About Figma to WordPress Conversion Using Visual Composer
Can I convert Figma designs to WordPress without coding?
Yes, with Visual Composer, you can convert Figma designs into WordPress pages using its drag-and-drop interface, no coding required.
Is Visual Composer compatible with all WordPress themes?
Not all WordPress themes are fully compatible. For best results, choose a theme that explicitly supports Visual Composer.
How do I ensure that my WordPress site matches my Figma design?
Carefully analyze the Figma layout and apply consistent styles, colors, and fonts in Visual Composer to ensure your WordPress site matches your Figma design.
Can I make my Figma to WordPress site mobile-friendly with Visual Composer?
Absolutely. Visual Composer includes tools for mobile optimization, allowing you to adjust layouts and elements for different devices.
What are the best practices for SEO in Visual Composer?
Optimize image sizes, add alt text to visuals, and use heading tags properly to improve SEO.


