Figma is one of the most powerful wireframing tools today. Its collaborative user interface, intuitive design tools, and responsive features make it a go-to platform for UI/UX designers worldwide. From low-fidelity sketches to interactive prototypes, Figma allows you to create wireframes with ease.
In this guide, we’ll walk you through the entire process of creating wireframes in Figma. Step-by-step, we’ll show you how to set up your design file, choose the right templates, and transform your wireframe into a high-fidelity prototype.
What Are Wireframes?
Wireframes are the foundation of all great digital design. Whether you’re building a new website, redesigning an app, or mapping out a user journey, wireframes provide the essential structure that guides every web design decision.

Think of them as architectural blueprints. They help visualize the layout, flow, and interactions before jumping into detailed visuals or code. For web designers, developers, and stakeholders, wireframes act as a common language. They strip away distractions and focus purely on usability and structure.
Know more: Best Prototyping Tools for UI/UX Designers
An Overview of the Website Design Process
The design process often starts with wireframing. It’s a low-investment way to sketch out your ideas and solve design problems early.
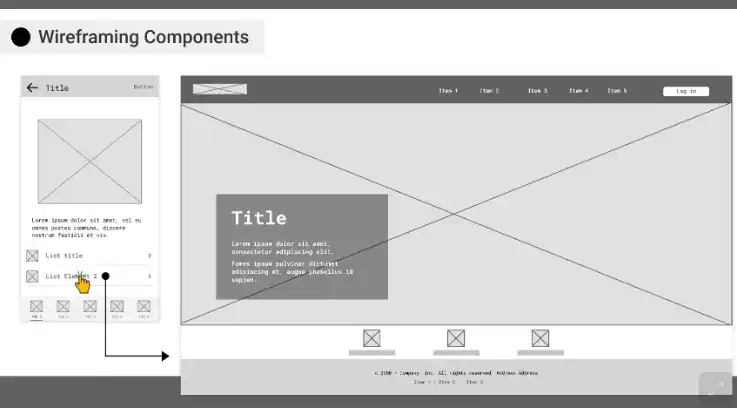
Wireframes are visual representations of a page’s layout. They focus on functionality, not final design elements like colors or imagery. These layouts typically include placeholders for UI elements such as headers, buttons, menus, and forms.
By using basic shapes and text, designers can arrange and test ideas quickly. It also helps communicate ideas clearly to stakeholders and developers before moving into detailed design or coding.
Using a component-based wireframe kit in Figma can streamline the process. These pre-made elements reduce repetitive work and ensure consistency. Plus, they enhance collaboration by standardizing design components across teams.
With Figma, everything happens in one place, from sketching initial ideas to building interactive prototypes. Its real-time collaboration features make it especially useful for teams working remotely or across different time zones.
Transform Your Wireframe into a Stunning WordPress Website
Turn your Figma wireframes into a fully functional WordPress website with our expert help. From design to deployment, we handle it all.
Steps to Create Wireframes in Figma
Creating wireframes in Figma is a streamlined and collaborative process that helps bring design ideas to life. Below are the key steps to guide you through wireframing in Figma.
Step 1: Setting Up a New Design File
To begin, open Figma and create a new design file. This will serve as your workspace for the wireframe and later stages of your project.

You can start from a blank canvas or choose from available templates. If you’re working on a website or mobile app, using Auto Layout in Figma is highly recommended. It helps maintain consistent spacing and responsiveness, especially for nested elements like cards or navigation menus.
Figma supports real-time collaboration, allowing team members to comment, edit, or leave feedback within the same file. This reduces back-and-forth emails and accelerates decision-making.
As mentioned above, consider using wireframe templates or kits to save time. These templates often come with ready-to-use components like headers, forms, image placeholders, and more. They give you a strong starting point and let you focus on layout and user flow rather than drawing each element from scratch.
Also read: How to Convert Figma Prototypes into Engaging 3D Model Viewers on WordPress
Step 2: Creating a Website Wireframe in Figma
Now that your file is set up, it’s time to design the structure of your website wireframe.
- Start by defining the layout. Use rectangles, lines, and text boxes to mark areas for content, images, navigation, and other core elements. Keep things simple; this is about layout and structure, not colors or final visuals.
- Use Figma’s tools to customize wireframe elements to reflect your design thinking. For instance, you might group similar components or apply constraints to make sure your design scales well on different screen sizes.
- Creating your own wireframe kit can also be a smart move. Save commonly used elements like buttons or navigation bars as components. This not only saves time but also ensures consistency throughout your design.
Lastly, keep usability at the forefront. Think about how users will interact with your website. Use feedback from early testing or stakeholders to refine your wireframe and improve the flow.
Learn: Best UI/UX Design Trends
Step 3: Using Wireframe Templates
Wireframe templates are a huge time-saver. They provide a pre-made structure that’s easy to customize based on your project requirements.
Figma’s community offers a wide range of free and premium wireframe templates. You can browse the template library directly within Figma or download kits from external sources. These templates come in both low fidelity and high fidelity versions.
- Low-fidelity templates are useful during the early stages of design.
- High-fidelity ones are helpful when you’re getting closer to the final product.
Once you find a template you like, simply copy it into your design file and start editing. Add your own content, adjust spacing, and tweak layouts to match your brand and user goals.
You can also create your own custom template for repeated use. If you frequently design websites or apps for a similar niche, having a reusable wireframe kit can save countless hours.
Find Out: Is Figma Free for Your Design Needs
Step 4: Building a Design File
Your design file in Figma is more than just a place to draw; it’s your central hub for everything related to your project.
- Organize your file using pages and frames. For example, you might have one page for low-fidelity wireframes, another for high-fidelity mockups, and a third for prototypes.
- Use Figma’s layers and naming conventions to keep everything tidy. Group related elements and label them clearly. This makes it easier to manage changes and allows team members to find things quickly.
- Take full advantage of Figma’s design libraries. Add shared styles, components, and fonts to ensure consistency across pages.
Through real-time collaboration, designers, web developers, and stakeholders can all work together in the same file, leave comments, and track changes.
Step 5: Designing for Low Fidelity and High Fidelity Wireframes
There’s a time and place for both low-fidelity and high-fidelity wireframes.
Low-fidelity wireframes are basic. They focus on structure, layout, and hierarchy. These are great for early feedback and ideation because they keep discussions centered on function, not style.
High-fidelity wireframes, on the other hand, include more detailed design elements. They often show typography, spacing, images, and sometimes even interactions.
With Figma, you can start with low fidelity wireframes and then iterate into high fidelity. Copy your frames and start refining them. Next, adjust colors, add icons, and polish the layout.
This progressive approach helps reduce rework and makes sure the final design stays true to the original concept.
Step 6: Creating a Mobile-Friendly Design
Mobile-first design is no longer optional. A large percentage of users access websites on smartphones, so your wireframes must reflect that reality. In Figma, you can easily create wireframes for various screen sizes.

- Use pre-set frame sizes for popular devices like iPhone or Android models.
- Start by designing the mobile layout separately.
- Focus on vertical stacking, touch-friendly buttons, and simplified navigation.
As you wireframe for mobile, test usability continuously. Make sure the user flow is clear, the buttons are easy to tap, and the content is readable.
Figma allows you to preview designs directly on your phone using the Figma Mirror app. This is a powerful way to test real-world usability before moving forward with high fidelity design.
Read: How to Make Your Figma to WordPress Site Fully Responsive
Step 7: Adding Interactivity to Your Wireframe
Once your wireframe is complete, it’s time to add interactivity and test the user journey.
- Figma’s Prototyping mode lets you connect frames, add transitions, and simulate real user flows. You can define interactions such as clicks, hovers, or scroll effects.
- Add interactive hotspots to menus, buttons, or form fields. This turns your static wireframe into a functional prototype.
- Interactive wireframes help stakeholders understand the flow and provide better feedback. They also help developers visualize how components should behave.
You can also share your prototype via a link. Clients and team members can view, comment, and suggest changes, all without needing a Figma account.
Check out: Pros and Cons of Using Page Builders in Figma to WordPress Conversion
Step 8: Testing and Refining Your Wireframe
No wireframe is perfect on the first try. Testing and refining are critical parts of the process.
- Use Figma’s sharing features to gather feedback from teammates, clients, or even test users. Encourage them to walk through the design and leave comments.
- Look for friction points. Are users confused about where to click? Are key actions buried or unclear?
- Use this input to iterate on your wireframe.
- Also consider A/B testing different wireframe versions. This can help you choose the best layout, structure, or content placement.
Refinement is where good designs become great. Don’t rush this step. Take time to validate each change and ensure the wireframe serves both user and business goals.
Bonus: What is a Design Sprint?
A Design Sprint is a structured, time-boxed process used to solve complex problems through design, prototyping, and user testing, typically in just five days. Originally developed by Google Ventures, it combines business strategy, design thinking, and user-centered design into a focused, collaborative workflow.
The sprint includes five key phases:
- Understand: Define the problem, map the user journey, and set goals.
- Sketch: Brainstorm and sketch possible solutions individually.
- Decide: Choose the best ideas and create a storyboard.
- Prototype: Build a realistic prototype using tools like Figma.
- Test: Test the prototype with real users and gather feedback.
Why Use a Design Sprint?
Design Sprints are valuable because they:
- Save time and resources by avoiding endless planning cycles
- Align teams quickly around a shared goal or vision
- Encourage rapid problem-solving through creativity and collaboration
- Minimize risk by testing ideas with real users before investing in development
- Improve product decisions based on early, actionable feedback
In short, a Design Sprint helps you move from idea to validated prototype fast, making it ideal for startups, product teams, and agencies looking to innovate efficiently.
Know about: Top Figma-Friendly WordPress AI Website Builders
Is Design Sprint Related to Wireframes?
Yes, a Design Sprint is closely related to wireframes, but they are not the same. During a Design Sprint, particularly on Day 4 (Prototype), wireframes often play a critical role. Here’s how they connect:
- Wireframes serve as the foundation for the prototype. Before building a detailed, interactive version, teams usually create low-fidelity wireframes to outline layout, structure, and user flow.
- Wireframes help visualize solutions quickly, making it easier for teams to align and iterate without focusing on colors or visuals.
- In user testing (Day 5), wireframe-based prototypes allow you to gather real feedback on functionality and usability before investing time in high-fidelity design or development.
So, while wireframes are just one part of the sprint, they’re essential to rapidly transforming ideas into testable, user-centered designs.
Conclusion
Creating wireframes in Figma is one of the smartest ways to streamline your design process. With its intuitive tools, collaborative features, and design flexibility, Figma allows you to go from idea to interactive prototype right from a single platform.
By starting with low fidelity wireframes, you can focus on functionality and user flow. Then, gradually evolve your design into a high fidelity prototype ready for development. Templates and design kits can also help you save time, while testing and feedback ensure your design is on the right path.
Wireframing isn’t just a step in the process; it’s the foundation of good design. When done right, it sets the tone for a user-friendly, goal-driven experience that both users and stakeholders will love.
So open Figma, follow the steps in this guide, and start building wireframes that make a real impact.
Figma Wireframes FAQs
Can I make wireframes in Figma?
Yes, you can make wireframes in Figma. It offers all the tools needed to design low and high-fidelity wireframes easily.
How to create a wireframe?
To create a wireframe, start a new design file, use basic shapes and text to structure the layout, and organize elements with Auto Layout or templates.
What is the plugin to create wireframes in Figma?
Several Figma plugins can help create wireframes, such as Wireframe, Wire Box, and UX Wireframe. These plugins offer pre-built components to speed up your workflow.
What is the best tool to create wireframes?
Figma is considered one of the best tools for creating wireframes due to its user-friendly interface, real-time collaboration, and extensive plugin support.