

In this guide, we’ll walk you through the basics of how to use Figma, from setting up your first file to mastering key features like Auto Layout, Layers, and more.
Designing digital products has never been more intuitive, and Figma makes it even easier. Whether you’re a designer, developer, marketer, or product manager, Figma offers an all-in-one design solution that streamlines collaboration and boosts productivity. From wireframes to prototypes, Figma enables you to design stunning user interfaces right from your browser or desktop.
If you’re new to Figma or just looking to sharpen your skills, this article will help you get started the right way.
What is Figma?
Figma is a cloud-based design and prototyping tool that allows teams to collaborate in real-time. Unlike other design tools that require local installation and file sharing, Figma operates directly in your browser or as a desktop app. This makes it super convenient for remote teams.

You can use Figma to:
- Design mobile apps, websites, dashboards, and landing pages
- Create interactive prototypes
- Share designs and gather feedback
- Build design systems with reusable components
And the best part? It’s beginner-friendly with tons of built-in resources and templates to speed up your learning curve.
Know more: Best Websites for Finding Figma to WordPress Freelancers
Setting Up Figma
Getting started with Figma is simple, even if you’ve never used a design tool before. It’s designed to be user-friendly and doesn’t require any complex installation or technical knowledge. Follow these steps to hit the ground running.
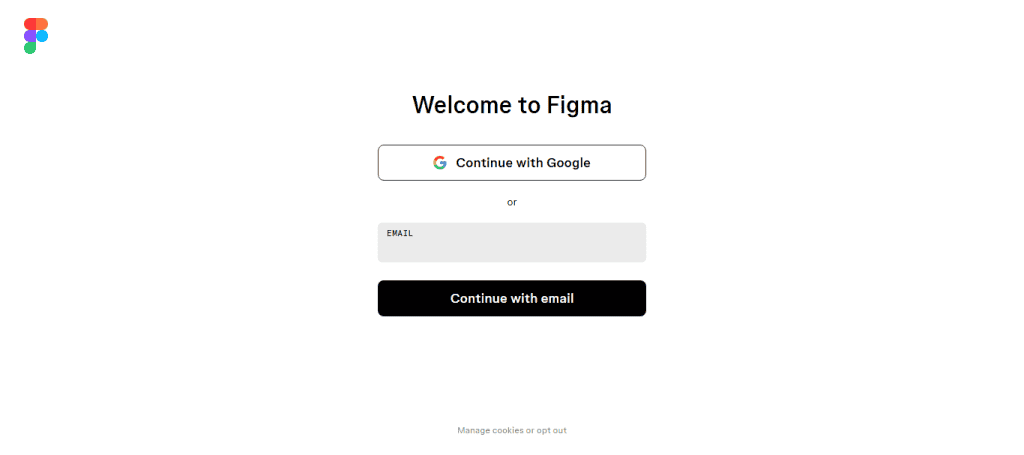
Create a Figma Account
Head over to figma.com and sign up using your email address or Google account.
- Free Plan: This plan is ideal for individuals or small teams. It provides access to design tools, cloud storage, and collaboration features. If you’re a freelance designer just starting out, the free plan is perfect. It allows you to create up to 3 projects and collaborate with others in real-time without spending a dime.
- Paid Plans: If you’re working with larger teams or need advanced features like team libraries, version control, and analytics, you can explore Figma’s paid tiers (Professional, Organization, or Enterprise).
Access Figma: Browser or Desktop App
Figma offers two ways to use the tool:
- Web Browser: Simply log in at figma.com and start designing. No download needed!
- Desktop App: If you prefer a more responsive experience, download the app for Windows or macOS from the Figma website. The desktop version often runs smoother and gives you easier access to keyboard shortcuts.
Note: If you’re working on a laptop with limited RAM, using the desktop app might reduce lag when working on complex files.
Create Your First Project
Once logged in, you’ll land on the Figma dashboard, which is your workspace for managing files and teams.
To start designing: Click “New Design Figma File” (the big “+” button or from the File menu). This opens up the main Figma editor, where you’ll do all your designing. You’ll see a blank canvas; think of it like a digital piece of paper.
Here’s what you’ll notice:
- The Toolbar at the top (for tools like Frame, Shapes, Text)
- The Layers Panel on the left (where your design elements are organized)
- The Properties Panel on the right (to customize selected items)
Example: Let’s say you’re designing a simple login screen for a mobile app. Start by using the Frame Tool (F) to choose an iPhone screen size. Then, use the Rectangle Tool (R) to draw input fields and the Text Tool (T) to add labels like “Email” and “Password.”
By creating an account, choosing the right platform (browser or app), and launching your first project, you’re all set to explore Figma’s design universe. Also, Figma autosaves your work, so you can experiment without fear of losing progress.
Also checkout: Best Prototyping Tools for UI/UX Designers
Creating a New Design File in Figma
Once you’ve logged in and reached the Figma dashboard, you’re ready to create your first design. Whether you’re designing a mobile app screen, a website wireframe, or a social media graphic, everything starts with a new design file.
Step-by-Step Guide to Creating a New Design File
From your Figma dashboard:
- Click on the “+” New Design File button on the top-right corner, or
- Click the “File” menu and select “New Design File.”
This opens the Figma editor in a new tab or window with a blank canvas.
Set Up Your Design Canvas Using Frames
Frames in Figma act like artboards or screens. They help define the dimensions and layout of your design.

Select the Frame Tool by pressing F or by clicking it in the top left corner toolbar. On the right panel, you’ll see a list of preset frame sizes such as:
- Mobile (e.g., iPhone 13, Pixel 6)
- Desktop (e.g., MacBook Pro, 1440px desktop)
- Tablet or Custom sizes
Click on one of these presets, or click and drag on the canvas to create frames that are customized.
Tip for Beginners: If you’re designing a mobile app, choose an iPhone or Android phone preset. For a website layout, go with a Desktop preset like 1440px width.
Further reading: How to Convert Px to Inches for Figma to WordPress Projects
Add Basic Shapes to Your Design
You can begin laying out visual elements now that your canvas is ready.

- Use the Rectangle Tool by pressing R or selecting it from the shape tools dropdown.
- Click and drag on the canvas to draw a rectangle.
- You can also add Circles (O), Lines (L), Polygons, and Stars (from the dropdown under the shape icon)
These shapes can be used as buttons, containers, placeholders, or any visual block element.
Add and Customize Text
To insert text:
- Press T or select the Text Tool from the top toolbar.
- Click anywhere on the canvas and start typing.
With the text selected, use the Properties Panel on the right to adjust:
- Font style and size
- Text color
- Line height and letter spacing
- Text alignment (left, center, right)
Figma supports all Google Fonts and also allows you to upload custom fonts through the desktop app.
Example: For a simple hero section on a landing page, you might use a heading in size 36pt and a subheading in 18pt. You can align them centrally and add a background rectangle to visually frame the section.
Real-Time Auto Save
One key advantage of using Figma is that it automatically saves your work as you go. There’s no need to hit “Save” manually. Figma stores every change in the cloud in real time. You can also review version history by clicking on File ⟶ Show Version ⟶ History to revisit previous versions of your design.
Creating a new design file in Figma is the starting point of any project. By learning how to set up frames, add basic shapes, insert and style text, you’re laying a solid foundation for building complete, professional-grade designs.
Working with Figma’s Design Fundamentals
Understanding the core elements of design structure in Figma, such as layers and text, is essential for building clean, organized, and scalable projects.
Layers and Structure in Figma
In Figma, every element you add, whether a shape, frame, image, or text, automatically becomes a layer. The Layers Panel, located on the left side of the interface, stacks these layers on top of each other.

Why do Layers Matter?
Layers help you stay organized, making it easy to locate and edit elements. They also help you maintain a clear hierarchy in your design and work efficiently in collaborative settings.
Key Figma Layer Management Tips:
You can click on any layer in the assets panel to select it on the canvas. Layers are listed from bottom to top. The topmost layers appear in front of the lower ones.
- Rename: Double-click on a layer’s name to rename it. For easier identification, use descriptive names like “Header Background” or “Submit Button.”
- Group Layers for Clarity: Select multiple elements and press Cmd/Ctrl + G to group them. Grouping allows you to move and resize elements together as a single unit. Ungroup with Cmd/Ctrl + Shift + G if needed.
- Nest Layers within Frames: Frames can act like containers for other layers. Nesting elements in a frame allow you to move, scale, or apply constraints to a group of layers in a structured way.
Example: If you’re designing a card layout with an image, title, and description, group those elements together and name the group “Product Card.” This helps keep your design tidy and reusable.
Working with Text in Figma
Text is a fundamental part of user interface design, and Figma offers a robust and intuitive text tool to handle everything from headers to fine print.

Adding Text in Figma
Press T or click the Text Tool in the toolbar to select it. Click anywhere on the canvas and begin typing. Figma creates a text layer that you can reposition, resize, and customize.
Customizing Text in the Properties Panel
Once your text layer is selected, use the Properties Panel on the right to adjust:
- Font Type: Choose from hundreds of Google Fonts or upload your own (with the desktop app).
- Font Size: Adjust the size for readability and hierarchy.
- Line Height: Controls the space between lines of text.
- Letter Spacing: Adjusts space between characters.
- Color: Use hex, RGB, or choose from your color styles.
- Text Alignment: Align left, center, right, or justify.
Creating and Using Text Styles in Figma
If you’re using the same typography repeatedly, save it as a Text Style:
- Select your styled text.
- Click the four-dot icon next to the font size in the Properties Panel.
- Create a new text style and name it (e.g., “Heading Large” or “Body Text”).
This helps maintain consistency and makes updates easier across large projects.
Aligning Text Precisely
To ensure your text aligns well with other design elements:
- Use Smart Guides that appear when moving elements.
- Turn on Layout Grids (via the Properties Panel) for more control.
- Snap text to pixels or align to other layers for pixel-perfect design.
Example: When designing a blog article card, you might have a headline in bold 24pt font, followed by a short description in regular 14pt. Creating a consistent style for both ensures a clean, uniform layout across all your cards.
Mastering layers and text in Figma helps you keep your designs well-organized and professional. Proper layer structuring saves time when editing or collaborating, while smart use of text styles guarantees visual consistency.
Know the difference: JPEG vs JPG in Figma to WordPress Workflow
Designing with Auto Layout in Figma
Auto Layout is one of Figma’s most powerful features. Once you understand how it works, it can dramatically speed up your design process. It allows you to build layouts that automatically adjust when content changes, making your designs more responsive and efficient. Think of Auto Layout as a way to give your frames or groups smart behavior. Instead of manually adjusting element positions, Figma does it for you.

How to Use Auto Layout in Figma?
To get started with Auto Layout:
Select a Frame or Group of Elements: This can be a group of buttons, cards, or even a text box and icon. You can also draw a new frame (using the Frame Tool) and apply Auto Layout from the start.
Apply Auto Layout: With your frame or group selected, go to the Properties Panel on the right. Click the “+” button next to Auto Layout. Figma will instantly arrange the elements either vertically or horizontally, depending on their current position.
Customize the Layout: Once Auto Layout is applied, you can adjust:
- Direction: Horizontal (row) or Vertical (column)
- Spacing Between Items: Set fixed or variable space between elements
- Padding: Add internal spacing around the content
- Alignment: Align items to the start, center, end, or stretch to fill
Example: Let’s say you’re designing a button. If you wrap a text layer inside a frame and apply Auto Layout, the button will automatically resize based on the length of the text. Add padding to control how much space appears around the text inside the button.
Why Auto Layout Matters?
With Auto Layout, your designs adapt to content changes without needing constant manual adjustment. This is especially useful when:
- Buttons have dynamic labels (e.g., “Send” vs. “Submit your response”)
- Cards display different lengths of text
- List items grow or shrink in number
Efficient Design Workflow: Instead of adjusting each element individually, you can apply Auto Layout and let Figma handle alignment and spacing. This saves time, reduces errors, and helps maintain consistency.
Perfect for UI Patterns: Auto Layout in Figma is ideal for common interface patterns like:
- Navigation bars
- Form fields
- Buttons
- Feature cards
- Modal content
Tip: Nesting Auto Layout frames within each other allows for more advanced layouts, such as a column of cards with evenly spaced content inside each card.
Works Seamlessly with Components: When you combine Auto Layout with Figma Components, you can create dynamic UI elements that are easy to reuse and maintain. For instance:
- A component-based button can resize across screens without breaking
- A card component can adapt to different types of content without needing duplication
Collaboration and Sharing in Figma
One of the biggest advantages of using Figma is its real-time collaboration capabilities. Unlike traditional design tools that rely on sending files back and forth, Figma is cloud-based, meaning multiple people can work on the same file at the same time, from anywhere.
Whether you’re part of a large design team or simply sharing a mockup with a client, Figma provides a range of tools to collaborate and keep your workflow organized.
How to Share Your Design
To start collaborating, you need to share your design file:
Click the Share Button, which is located in the top-right corner of your design file. You can invite others by entering their email addresses. Also, choose permission levels:
- Can view: Ideal for stakeholders and clients who just need to see the design.
- Can edit: Suitable for team members who need to make changes or contribute directly.
Generate a Link: Alternatively, you can create a shareable link. Set link access to:
- Anyone with the link
- Only people invited
- Anyone in your team or organization
This makes it easy to control who can see or edit your file.
Real-Time Collaboration in Figma
When more than one person is editing a file:
- You’ll see their cursors live on the canvas.
- Any changes they make happen instantly; no need to refresh.
- You can watch someone edit, give feedback, or work side-by-side without missing a beat.
Example: If you’re designing a website and a developer is inspecting the layout, they can use Figma’s inspect panel while you make adjustments. Both of you will see updates instantly.
Commenting and Feedback
Figma’s comment feature makes it easy to collect feedback without needing external tools.
- Activate the Comment Tool: Press C on your keyboard or click the comment icon in the top bar. Click anywhere on the canvas to leave a comment.
- Mention Teammates: Use @mention to tag team members directly (e.g., @Sarah). They’ll get notified via email and within Figma.
- Resolve Comments: Once a comment is addressed, you or your teammate can click Resolve to mark it as complete. This keeps the feedback loop clear and organized.
Comments stay tied to the design element they reference, so there’s no confusion about what the feedback refers to, even if the design changes slightly.
Version History and File Management
Figma automatically tracks every change made to your file and lets you access past versions.
- Access Version History: Go to File ⟶ Show Version History. You’ll see a timeline of changes with timestamps and editor names.
- Revert to a Previous Version: Click on any previous version and choose Restore This Version if needed. You can also name versions manually to highlight milestones or checkpoints in the design process.
Example: Before a client presentation, you might save a named version called “Client Draft v1” so you can easily return to it after gathering feedback.
Bonus: Exploring Figma’s Community Resources
Figma’s Community Hub is packed with free templates, UI kits, plugins, and tutorials. Here’s what to look for:
- Design templates for apps, dashboards, and websites
- Plugins for icons, charts, and stock images
- Tutorials to learn best practices and advanced techniques
Learn: How to Hide Elementor Section in Figma-Modeled WordPress Sites
Final Thoughts
Figma has revolutionized the way teams design, prototype, and collaborate. With its user-friendly interface, powerful design tools, and real-time collaboration, it’s an essential tool for modern product development. By learning the basics, you’ll be well on your way to becoming proficient in Figma.
So, don’t be afraid to explore. Design. Test. Iterate. Figma gives you everything you need to bring your ideas to life.
FAQs About How to Use Figma
How do you use Figma step by step?
Start by creating an account, opening a new design file, and using the frame tool to create your layout. Then, add shapes and text, customize with the properties panel, and explore features like Auto Layout and components.
Can a beginner use Figma?
Yes, a beginner can absolutely use Figma, as it is designed to be intuitive. With built-in templates, tutorials, and a welcoming community, even beginners can start designing within minutes.
What is Figma mainly used for?
Figma is mainly used for UI/UX design, prototyping, wireframing, and collaborative product design. It’s ideal for creating web and app interfaces.
Can I teach myself Figma?
Yes, you can. There are plenty of free resources, including figtowp, Figma’s own Learn Hub, YouTube tutorials, and community templates to help you learn at your own pace.
Is Figma free to use?
Yes, it is. Figma offers a free plan that’s great for individuals or small teams. Paid plans offer more features like version history and advanced collaboration tools.


