Designing a website is no longer just about how things look; it’s also about how things work, how fast you can iterate, and how well your team collaborates. This guide will walk you through how to create a website mockup using Figma, step by step.
Figma is a browser-based design, vector graphics editor, and prototyping tool that has transformed how web designers build websites, apps, and user interfaces. Whether you’re a freelance designer, part of a startup, or working in a larger organization, Figma offers an efficient, collaborative, and intuitive way to bring your web design ideas to life.
We’ll explore everything from setting up the initial layout to using powerful Figma plugins and adding animations. If you’re looking to create a stunning, functional, and professional-looking website mockup, you’re in the right place.
Why Use Figma for Website Mockups?
Before we dive into the steps, let’s explore why Figma is the tool of choice for many UI/UX designers:

- Cloud-based collaboration: Work with your team in real-time, right from your browser.
- Cross-platform: Runs on Windows, Mac, Linux, and even Chromebooks.
- Built-in prototyping: No need to switch tools for interactive prototypes.
- Vast plugin library: Access design assets, generate content, or create mockups with ease.
- Auto layout & responsive design: Create flexible designs that adapt across devices.
Bring Figma Mockups to Life with a Custom WordPress Website
Turn your static designs into a fully responsive, high-performance WordPress site. Whether it’s a landing page or a full website, our team will handle the development, optimization, and launch.
Steps to Create a Website Mockup with Figma
Creating a website mockup with Figma helps visualize design ideas, streamline collaboration, and efficiently build responsive, user-friendly web interfaces. Here’s how to do it:
Step 1: Set Up the Mockup Structure
Every great design begins with a solid foundation. In Figma, this means organizing your canvas with the right frames, grids, and layout settings. These tools help ensure your mockup is clean, consistent, and responsive across various devices.

Create a New Design File
Start by opening Figma and creating a new design file. Give it a descriptive name based on your project, such as “Portfolio Website Mockup” or “Ecommerce Homepage Layout.” Naming your files properly helps keep your workspace organized, especially when collaborating with others.
Set Up Figma Frames
Frames are essential, as they define your design boundaries and simulate different screen sizes.
- Use the Frame tool (shortcut: F) from the top bar or press F on your keyboard.
- The right-hand panel allows you to select standard screen sizes (e.g., Desktop 1440px, Tablet 768px, Mobile 375px).
- Think of frames as artboards where you’ll design each webpage or component.
Tip: Create multiple frames if you’re designing for both desktop and mobile views. This helps you maintain responsiveness from the beginning.
Apply Grids and Layout Columns
Grids give structure to your design, making it easier to align elements and maintain visual consistency.
- Select your frame.
- On the right-hand panel, click ‘+’ next to Layout Grid.
- Change the grid type to Columns.
- Set it to a 12-column layout with appropriate gutter spacing (e.g., 20px) and margins.
This layout mirrors what developers use in CSS frameworks like Bootstrap or Tailwind, making handoff easier.
Set a Visual Context
Before adding content, apply a soft background color or placeholder image. This helps set the visual tone and keeps your mockup grounded in reality. A light gray, off-white, or subtle gradient often works well as a base.
Setting up your mockup structure the right way ensures the rest of your design process flows smoothly. It’s the difference between a cluttered canvas and a clean, professional-looking layout.
Know more: How to Prepare a Figma File for WordPress Developers
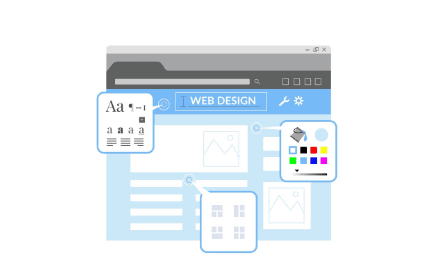
Step 2: Build the Mockup Design
Once the structure is ready, it’s time to design your website mockup.
- Add Basic Elements
- Start by adding key elements like:
- Headers
- Navigation menus
- Hero sections
- Text blocks
- Buttons
- Images
Use Figma’s Text tool (T) to insert headings and body text. For shapes and buttons, use the Rectangle (R) or Button plugin.
Customize Your Design
- Choose a color palette that aligns with your brand.
- Set typography styles (font, weight, spacing) for headings, body, and buttons.
- Use auto layout to make elements align and space themselves automatically.
- Use components for reusable elements like buttons, cards, or nav bars.
Explore Layout Options
It’s a good idea to create a few variations of the same section. For example, try two different hero layouts or footer designs. This gives you the flexibility to iterate and choose what works best.
Read: How to Convert Figma’s Px to Cm for WordPress Print Outputs
Step 3: Enhance Your Design with Figma Plugins
Figma’s plugin ecosystem can speed up your workflow and enhance visual appeal. Recommended plugins for website mockups:
- Mockuuups Studio: Place your designs in realistic device mockups (great for visual representations).
- Unsplash: Quickly insert free, high-quality images.
- Icons8 or Feather Icons: Add professional icons directly into your canvas.
- Content Reel: Generate dummy content for testing layouts.
- Color Palettes: Find and apply attractive color schemes.
To install plugins: Click on the Resources icon (top bar) → Select “Plugins” → Search → Click “Run” or “Install”.
Step 4: Create Realistic Mockups
Once your website layout is designed, it’s time to present it in a visually compelling way. Realistic, visually appealing mockups help clients and stakeholders visualize the final product’s appearance on actual devices. This not only enhances presentations but also adds professionalism to your design portfolio.

One of the easiest ways to do this in Figma is by using plugins like Mockuuups Studio. This plugin lets you wrap your design inside high-quality device frames such as smartphones, tablets, and laptops within seconds. Here are the steps to use Mockuuups Studio:
Select the Design Frame: Click on the frame or screen you’ve designed in Figma that you want to place inside a device mockup.
Open the Plugin: Go to the top bar, click on the Resources icon, then in the search bar look for Mockuuups Studio. Launch the plugin directly from there.
Choose a Device Mockup” Browse through a wide selection of device templates, MacBooks, iPhones, Android phones, tablets, and more. Choose the one that best fits your use case or audience.
Customize the Presentation: Once you select a device, the plugin inserts your design into it. You can now:
- Change the background color or image
- Adjust the viewing angle or orientation
- Select different scene styles to match your branding or presentation mood
Export the Final Mockup: When satisfied, export your mockup as a high-resolution PNG or JPG. These are perfect for:
- Client presentations
- Pitch decks
- Marketing visuals
- Portfolio showcases
Realistic mockups are more than just visuals; they’re storytelling tools. They bridge the gap between abstract wireframes and the end-user experience, helping your audience connect with the design on a practical level.
Check out: How to Create Figma to Elementor WordPress Template
Step 5: Add Interactions with Prototyping
A static layout gives a clear visual, but interactivity brings your design to life. Figma’s built-in prototyping tools let you simulate how users will interact with your website: clicking buttons, hovering over menus, opening pop-ups, or scrolling through content.
This step is essential for user testing, client presentations, and developer handoffs. With just a few clicks, you can create interactive flows that mimic real user experiences, all without writing a single line of code.
How to Prototype in Figma
Select a frame or element, then click the “Prototype” tab in the right-hand panel.
Connect Interactions: You’ll see a blue circle on your selected object. Drag it to the frame or element you want it to link to.
Define the Trigger: Choose how the interaction is triggered, such as on-click, while hovering, or after delay.
Set Animation Type: Select from animation styles like:
- Smart Animate is great for smooth transitions between similar layouts
- Instant is ideal for quick and snappy jumps
- Use Dissolve for subtle fades between screens
Tips for Prototyping
Connect your nav bar buttons to relevant sections or pages to mimic real navigation behavior.
- Create Hover States: Use duplicate frames or components to simulate hover effects on buttons and menus.
- Simulate Scrolling: Use vertical frames with long content and enable scrolling under the frame settings.
- Prototype Mobile Interactions: Show how mobile menus open or how modals behave on tap events.
Comparison: Figma vs Origami Studio for Motion Prototyping in Web Design
Step 6: Test and Review Your Design
Once your mockup and prototype are ready, it’s time to test your design. To preview in Figma:
- Click the “Present” button (play icon in top-right).
- View your design as a user would, interacting with buttons and navigating pages.
- Test responsiveness by adjusting frame sizes or duplicating for mobile views.
Next, collect feedback:
- Share the design via link (no downloads needed).
- Invite stakeholders or team members to leave comments directly in Figma.
- Use version control to track changes and iterate as needed.
Figma’s real-time collaboration makes it easy to review and revise without losing context.
Step 7: Export and Share Your Mockups
Once you’re happy with your mockup, you’ll want to export and share it. Export options are as follows:
- Select the frame or component.
- Go to the right-hand panel → Click “Export.”
- Choose Figma file formats: PNG, JPG, PDF, or SVG.
- For developers, export CSS and design specs using the Inspect tab.
You can also present your design as a clickable prototype or embed it on a website or presentation deck.
Ultimate Image Format Showdown: AVIF vs WebP
Final Touch: Animations and Micro-Interactions
Animations add personality and polish to your mockup. Figma supports subtle and complex animations through its prototyping features. Here are some animation ideas:
- Hover states on buttons.
- Slide-in navigation menus.
- Smooth scroll transitions.
- Loading effects or micro-interactions.
To achieve this, use “Smart Animate” and time-based transitions. For more advanced effects, pair Figma with motion tools like Figmotion plugin.
Conclusion
Creating a stunning website mockup with Figma isn’t just for professional designers; anyone with a vision can use its intuitive tools to design functional, beautiful interfaces.
With Figma, you’re not just designing; you’re prototyping, collaborating, and building with purpose. From setting up your layout to adding interactions and refining every visual element, Figma provides a complete toolkit for crafting a professional web experience.
By following the steps in this guide, you’ll be able to:
- Set up responsive layouts
- Design intuitive and beautiful interfaces
- Enhance your workflow with powerful plugins
- Create interactive prototypes for testing
- Share and collaborate in real-time
Whether you’re designing a personal portfolio, a client website, or an app interface, Figma helps turn ideas into reality efficiently and creatively.
FAQs About Website Mockup with Figma
How do I make a website mockup in Figma?
To make a website mockup in Figma, start by creating a new file, set up frames for your target screen sizes, and apply a grid system. Then use design tools to add elements like text, images, and buttons. You can enhance your mockup using plugins such as Mockuuups Studio.
Is Figma good for mockups?
Yes, Figma is excellent for creating mockups. It offers powerful design tools, responsive frames, real-time collaboration, and plugins that help you create realistic mockups for various devices.
How do I create a responsive website mockup in Figma?
To create a responsive mockup in Figma, use auto layout, flexible grid systems, and constraints. These features allow your design to adapt seamlessly to different screen sizes, from desktop to mobile.
Is Figma good for building websites?
Figma is ideal for designing websites but doesn’t build the site itself. It’s used to design layouts and UI elements that developers can then translate into code using platforms like WordPress, Webflow, or custom development.
Can I export Figma mockups for clients or developers?
Yes, you can export Figma designs as PNG, JPG, PDF, or SVG files. Figma also allows you to share website design links with clients and developers for easy feedback and collaboration. This helps facilitate a smoother website development process and make the task of final design approval from various stakeholders on the same project easy.
What are the best Figma plugins for website mockups?
Some of the best Figma mockups plugins include Mockuuups Studio for realistic device previews of complex and basic layouts, Unsplash for high-quality images, Iconify to create icons, and Content Reel for placeholder content of the real website. These plugins streamline the design process and improve presentation quality.