
When it comes to digital design, creating an engaging and visually appealing user experience is important. And, one of the powerful tools to achieve this is to use blur in Figma. Blur effects can add depth, focus, and movement to your designs, making them more dynamic and interesting.
Whether you’re looking to highlight specific elements or create a soft background, blurring techniques can be your go-to solution to create stunning designs.
By understanding how to use blur in Figma, you can enhance the hierarchy, contrast, and overall attractiveness of your designs. This guide will walk you through the different types of blur effects available in Figma and how you can apply them to transform your design projects.
What is the Blur Effect in Figma?
Blur effects in Figma enhance design and user experience. By adding depth and visual interest, they help guide user attention and improve the overall hierarchy and contrast of your design. Here’s a brief look at the various elements of blur effects within Figma.
- Enhancing Design with Blur Effects: Strategically using blur effects can elevate your designs significantly. They are particularly effective in creating a sense of depth and movement in two-dimensional layouts.
- Types of Blur Effects: Understanding and mastering the different types of blur effects, such as Layer Blur and Background Blur, is essential. Both have their unique applications and benefits.
- Creating Depth and Movement: By applying blur effects, web designers can introduce depth and dynamic movement into static designs. This technique effectively draws user attention to specific elements while also enhancing the visual hierarchy.
- Application in Design Elements: Blur effects in Figma can be applied to frames, groups, components, or individual layers. This versatility ensures that designers can use blur to achieve a variety of visual effects across their projects.
- Combining Blur with Other Effects: Blur effects can be paired with other design effects, such as drop shadows and inner shadows. This combination can result in unique and engaging visual styles that stand out.
Experimenting with different effect combinations is key to finding the perfect look for your design.
Beginner’s Guide: How to Use Figma
Understanding the Different Types of Blur Effects in Figma
Figma offers two primary types of blur effects: Layer Blur and Background Blur. Each has its use case and can significantly enhance the visual impact of your design.
Layer Blur in Figma
Layer Blur applies a uniform blur to a selected layer, image, or text. This effect is useful for creating depth or focus, simulating movement, or adding a soft background behind text.
For instance, by applying different levels of layer blur to various elements, you can create a depth of field effect that implies distance and dimensionality.

To apply a Layer Blur in Figma, follow these simple steps:
- Select the layer you want to blur.
- Navigate to the Effects section in the right sidebar.
- Click on the “+” icon and select “Layer Blur” from the dropdown menu.
- Adjust the blur intensity using the slider or input box to achieve your desired effect.
Experimentation is key to mastering Layer Blur. Try applying it to different components or groups and abstract backgrounds to see how it affects your design’s overall look and feel.
Complete Guide: How to Upload Files to Figma
Background Blur in Figma
Background Blur, on the other hand, targets only the areas behind a selected object. Thus, creating an effect where the background seems to fade out. This effect is excellent for highlighting text or important design elements, ensuring they stand out against intricate or busy backgrounds.

To apply a Background Blur in Figma, do the following:
- Place a shape or frame over the area you want to blur.
- Select this shape or frame.
- In the Effects settings, select “Background Blur” and adjust the blur settings to suit your needs.
This technique is particularly ideal for creating glassmorphism effects, where you give elements a frosted glass appearance. This application showcases your skills and makes your designs look modern and sophisticated.
Best Practices: Mastering the Vertical Scroll Bar in Figma
Combining Blur Effects with Other Design Elements
While blur effects in Figma are powerful on their own, combining them with other design elements can take your projects to the next level. Integrating blur effects with shadows, such as drop shadows and inner shadows, can create visually striking and dynamic results. These combinations not only capture attention but also convey a sense of depth and hierarchy, enhancing the overall user experience.
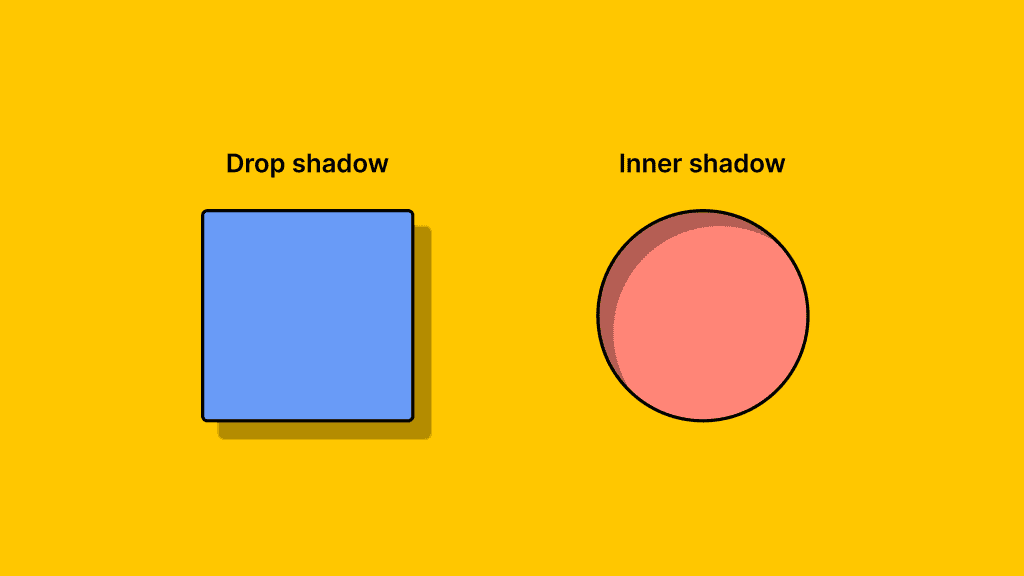
Drop Shadow Effects
A drop shadow adds an external shadow to an element. It simulates the effect of it being elevated or floating above the background. This technique creates separation between elements and gives them a distinct prominence.
When combined with blur effects, drop shadows can enhance the perception of an element’s importance without making the design overly harsh or contrasting. The blurred edges of both effects work together to maintain a soft, approachable aesthetic, preventing elements from appearing too rigid or isolated.
For instance, applying a subtle drop shadow along with a layer blur to a button can make it appear clickable and inviting. Thereby, drawing the user’s eye naturally and indicating functionality.
Inner Shadow Effects
An inner shadow, in contrast, is used to create the effect of an element being inset or recessed into a surface. This can be especially impactful when paired with blur effects, as it evokes a sense of depth that suggests volume and form.
The combination of a blurred layer and an inner shadow can make elements appear slightly sunken or engraved, adding a sophisticated layer of complexity to your design.
For example, applying an inner shadow to a card with a background blur can give it a soft, three-dimensional appearance. Thus, suggesting that the card is part of a larger system of elements.
Quick Steps: How to Create a Project Front Page Design with Figma
Combining Effects for Maximum Impact
The real strength of combining blur effects with shadow effects lies in their ability to highlight and differentiate various components within a design. By tweaking the intensity, angle, and color of shadows alongside blur effects, designers can craft unique aesthetic styles that enhance both functionality and visual appeal.
Furthermore, incorporating these techniques in strategic areas, such as navigation bars, buttons, and dialogue boxes, can guide users intuitively through the interface.
By experimenting with different combinations and settings, you can find the perfect balance that suits your project’s needs. Thereby, ensuring that your design is not only visually compelling but also user-friendly.
Advanced Design Techniques to Apply Blur Effects
Advanced design techniques in Figma can significantly enhance your design’s uniqueness and engagement. By experimenting with various combinations, you can achieve a look that captivates users and effectively communicates your design’s message.
- Combining Blur and Shadow Effects: Integrating blur effects with shadow effects, such as drop shadows and inner shadows, helps create a profound sense of depth and visual interest. These combinations direct user attention and improve both the hierarchy and contrast of your design.
- Creating Movement and Energy: To infuse your design with movement and energy, leverage blur and shadow effects alongside other design elements like images and text. By trying out different combinations, you can craft visuals that are dynamic and lively. Thus, ensuring that your design holds the viewer’s interest.
- Crafting Unique and Engaging Designs: Employing advanced design techniques allows you to create truly unique and engaging compositions. Using blur effects to create depth and dimension can set your design apart, making it both distinct and memorable.
Ultimately, by applying these advanced Figma design techniques, your project designs can stand out in any context. Proper use of blur and shadow effects can convey a sense of movement and energy, engaging users and encouraging them to interact with your design.
Find Out: Is Figma Free for Your Design Needs
Summary
Blur effects in Figma are more than just a tool; they’re a foundational element of modern digital design. They provide depth, focus, and texture, helping to guide users through your design in an intuitive and aesthetically pleasing way.
As with any design technique, practice is crucial. The more you experiment with different combinations of blur effects, the more confident you will become in using them to enhance your projects. Remember, the key to mastering blur effects is to find a balance that complements your design, enriches user experience, and serves your project’s broader objectives.
Whether you’re new to Figma or looking to refine your skills, incorporating blur into your designs will undoubtedly help your work stand out.
Blur Effects in Figma FAQs
How to make a blur effect on Figma?
To create a blur effect, select the layer, go to the Effects panel, click the “+”, and choose either “Layer Blur” or “Background Blur.” Next, adjust settings to your preference.
How to create a blur effect in general?
To create a blur effect in general in Figma, apply Layer Blur to blur an entire layer or Background Blur to blur the area behind an object. Tweak the settings to achieve the desired blur intensity.
What are some of the blur values in Figma?
In Figma, blur values are numeric settings that determine the intensity of the blur effect applied to a layer or background. For both Layer Blur and Background Blur, you can adjust the blur value in the Effects panel. Generally, the value can range from 0 to 100 or more, where higher values result in a more pronounced blur effect. Adjusting these values allows you to finely control the softness and clarity of the elements in your design.
How to make a blur gradient in Figma?
To make a blur gradient, overlay a gradient shape atop your background, apply a Background Blur, and adjust the blur intensity or opacity to merge the colors smoothly.
How do you blur a shape?
To blur a shape, select the shape, go to the Effects section, and choose “Layer Blur.” Then, adjust the blur amount in the layer’s bounds to achieve the desired effect.


