
Vector editing is one of the core strengths of Figma. Whether you’re designing icons, crafting illustrations, or tweaking UI shapes, you’ll eventually need to split a vector. But unlike traditional design software like Illustrator, Figma handles vector paths in a slightly different way.
In this guide, we’ll explore everything you need to know about how to split a vector in Figma.
You’ll learn step-by-step techniques, helpful plugins, and real-world design use cases. Even if you’re just getting started with Figma or you’ve been using it for years, you’ll find something useful here.
Why Would You Split a Vector in Figma?
Before diving into the how-to part, let’s understand why splitting a vector is useful in Figma.
When you split a vector, you’re essentially dividing a single shape or path into separate, manageable segments. This might seem like a small action, but it can significantly enhance how you design, edit, and organize your graphics, especially as your designs grow more detailed or complex.
Here are a few key reasons why splitting vectors can be a game-changer:
Edit Individual Parts Separately
Often, you’ll want to tweak just one part of a shape. Maybe you need to adjust the curve of a corner, change the fill of a specific segment, or scale only one portion of a graphic.
By splitting the vector, you can isolate that segment and edit it without affecting the rest of the shape. This is especially helpful when working with imported SVGs or shared design assets that weren’t originally created by you.
Create Complex Shapes by Combining or Subtracting Segments
Designing unique icons, logos, or illustrations often involves combining shapes or carving out parts of them. Splitting a vector allows you to subtract or merge only the parts you want. When paired with Figma’s Boolean operations, this technique lets you craft highly custom vector graphics that would be hard to draw manually from scratch.
Beginner’s Guide: How to Use Figma
Animate or Manipulate Pieces Individually
If you’re prototyping in Figma or planning to hand off assets for animation, splitting a vector makes it easier to animate parts independently. For example, if you’re building a pie chart or progress bar, you’ll need each segment to be its own shape to animate it smoothly or change colors based on user interaction.
Improve Performance and Clean Up Path Data
Sometimes, imported vectors or complex illustrations carry unnecessary anchor points and overlapping paths. This not only clutters your design but can slow down your project. Splitting vectors can help you isolate problem areas and clean up your file by removing extra data, resulting in lighter, more optimized assets.
Get Your Figma Design Developed into WordPress
Whether it’s a landing page, full website, or eCommerce store, our team converts pixel-perfect designs into custom WordPress themes that load fast and perform flawlessly.
Common Scenarios Where Splitting Vectors Helps
Now that you know why splitting vectors is useful, let’s look at some real-world scenarios where this technique truly shines. Whether you’re designing for web, mobile, or print, these use cases show how splitting vectors can simplify your workflow and unlock more creative flexibility.
Customizing Icons or SVG Imports
When you import SVG icons from external sources like icon libraries, you often need to make small tweaks like change colors, remove shapes, or adjust proportions. By splitting the vector into editable parts, you can isolate exactly what you need to modify without redrawing the icon from scratch.
Creating Broken Line Effects or Dashed Patterns
Want to create a broken underline, a road graphic, or a dashed stroke effect? Splitting a vector path lets you control each segment individually. This is especially helpful for illustrating motion, wireframes, or process diagrams.
Designing Abstract Artwork or Complex UIs
Modern UI designs often feature abstract shapes and layered compositions. Splitting vectors helps you build these elements in parts, making them easier to arrange, color, or animate later on.
Masking and Layering Vector Art in Sections
When working with masks or layer effects, having separate vector segments gives you more control. You can apply gradients, blurs, or layer styles to just one part of the design without affecting the rest.
In short, splitting vectors helps you build smarter, cleaner, and more adaptable designs across a range of creative projects.
Which is Better: WebP vs JPG
How to Split a Vector in Figma: The Core Methods
There isn’t a single “Split” button in Figma, but you can achieve the result through different techniques. Let’s go through them step by step.
Method 1: Using Vector Edit Mode
This is the most direct method and works well for basic edits. It is perfect for simple cuts, like turning a circle into a semi-circle. Here’s how to use vector edit mode:
- Select the vector shape.
- Press Enter or double-click to enter Vector Edit Mode.
- Click on the point or segment where you want to split.
- Use the Delete key to remove a segment or anchor point.
- Press P (Pen Tool) to add new points where needed.
If you need to break the path, right-click on a segment or point and choose “Disconnect Path”.
Tip: Use the “Open Path” option from the right-hand menu to convert a closed shape into an open path before editing.
Also read: How to Use Figma Components in WordPress Theme Development
Method 2: Using Boolean Operations
This method is best used for non-destructive editing and precise geometric cuts. Boolean operations help you combine or subtract multiple vector shapes.
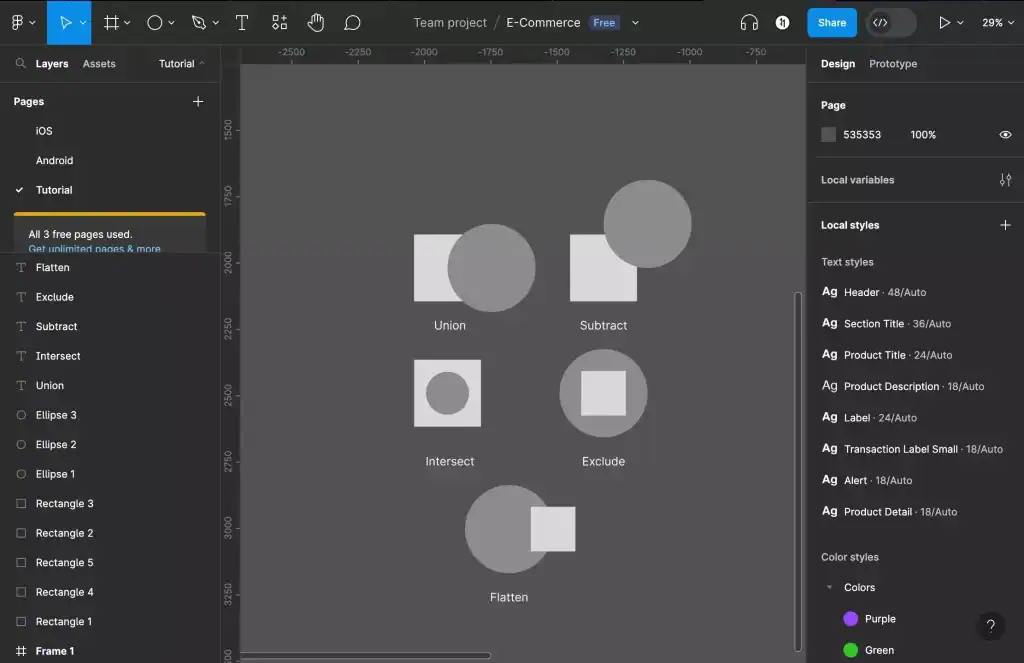
Key Boolean options in Figma are:
- Union to merge two or more shapes
- Subtract to cut the top shape from the bottom
- Intersect to keep only the overlapping area
- Exclude removes the overlapping section
Steps to Split Using Subtract:
- Draw a vector (rectangle, circle, or custom shape).
- Create another shape over the part you want to cut.
- Select both shapes.
- Click the “Subtract” Boolean in the top toolbar.
Figma will convert this into a compound shape, effectively “splitting” the original vector into new parts.
Example: To cut a triangle from a circle, simply position the triangle over the circle and subtract it.
Method 3: Using the Slice Tool
While not a traditional vector tool, the Slice Tool can help divide your design visually or for exporting. This method is helpful when you want to split a vector layout into multiple assets. It is also ideal for preparing UI assets for development or slicing icons for web use.
Here’s how to use it:
- Select the Slice Tool (S shortcut).
- Draw slices over the vector you want to export in sections.
These slices don’t alter the vector itself, but allow you to export separate regions.
Simple Steps: How to Use Figma for Product Design
Method 4: Pen Tool Workaround (Manual Cut)
Figma doesn’t offer a “knife” tool like Illustrator, but you can mimic it manually. This method requires a bit of precision but gives full control. Just follow these steps:
- Create your vector shape.
- Use the Pen Tool (P) to draw a new shape overlapping the area you want to split.
- Apply Subtract Boolean to cut the new shape from the original.
- Or use Intersect to keep only the overlapped section.
Method 5: Use a Plugin
This is the easiest method if you work with imported SVGs or complex paths. If you want more automation, Figma’s plugin ecosystem is here to help. You can use the Split Vectors plugin. This plugin allows you to split paths based on anchor points or custom logic.
- Go to Plugins ⟶ Browse Plugins in Community.
- Search for Split Vectors.
- Install and run the plugin.
- Select a vector path and use the plugin’s tools to split it.
You can install the plugin from the Figma community.
Know more: How to Use Figma Templates for Your Design Projects
Use Cases: Where Splitting Vectors Makes Sense
Splitting vectors isn’t just a technical trick; it’s a practical solution that can make everyday design tasks more efficient. Whether you’re working on interface elements or detailed illustrations, this technique can help you work smarter and more precisely.
- Icon Design: When you import icons from external sources or icon packs, they often come as a single, flattened vector. If you want to change the stroke color, modify just a portion, or animate a specific part, you’ll need to split the vector. This allows you to isolate and edit sections independently.
- Custom UI Elements: Designing a segmented progress bar, step tracker, or navigation indicator? Splitting a simple shape like a rectangle into smaller parts makes it easier to assign different states, colors, or animations to each section without rebuilding from scratch.
- Infographics and Charts: Highlighting a specific section in a pie chart or diagram? By splitting the shape into segments, you can apply styles or emphasize data visually, making your content easier to understand.
- Illustration Editing: Client-provided SVG illustrations are often complex. Splitting vectors helps you edit only the required portions, saving time and preserving original design details.
Guide to: How to Create a Stunning Website Mockup with Figma
Tips and Troubleshooting for Splitting Vectors in Figma
While splitting vectors in Figma is straightforward, a few helpful tips can make the process smoother and prevent common errors. Whether you’re refining icons or editing complex SVGs, these best practices will help you stay efficient and in control of your design.
- Zoom In for Better Anchor Control: When editing anchor points or breaking paths, always zoom in. This gives you more precision and helps avoid accidentally selecting the wrong point or segment, especially when dealing with intricate shapes or tiny details.
- Use Shift to Maintain Angles: While drawing or adjusting points, hold down the Shift key to keep your angles aligned to 45°, 90°, or 180°. This is particularly useful when splitting symmetrical designs or geometric shapes.
- Flatten Boolean Layers: Using multiple Boolean operations (like Subtract or Intersect) can slow down your file. Flatten these layers using Cmd/Ctrl + E once you’re satisfied with the shape. This reduces complexity and boosts performance.
- Duplicate Before Splitting: Before making any edits, duplicate the original vector (Cmd/Ctrl + D). This acts as a backup in case you need to undo changes or experiment without losing your base design.
- Ungroup Complex SVGs: Imported SVGs often contain nested groups. Press Shift + Cmd/Ctrl + G multiple times to ungroup and reveal individual vector paths. This makes it easier to isolate and split specific elements.
Read more: How to Convert Figma Prototypes into Engaging 3D Model Viewers on WordPress
Final Thoughts: Make Vector Editing in Figma Work for You
Vector editing in Figma doesn’t need to be intimidating. Whether you’re tweaking a single icon or building a complete UI kit, knowing how to split a vector in Figma gives you more flexibility and control.
While Figma may not have a direct “knife” tool, it offers enough features and plugins to make slicing vectors simple and effective. The best method depends on your design goal: quick edits, precise subtractions, or exporting clean segments.
So go ahead, experiment with these techniques in your next project. You’ll not only speed up your workflow but also elevate the quality of your designs.
FAQs About Splitting Vectors in Figma
Does Figma have a built-in tool to split vectors?
Figma doesn’t have a dedicated “Split” tool like Illustrator’s knife tool. However, you can split vectors using techniques such as Vector Edit mode, Boolean operations, or third-party plugins.
Can I split a vector shape into two separate parts?
Yes, you can manually split a vector into two parts by adding points using the Pen tool and then deleting or separating segments. Alternatively, use Boolean operations like Subtract or Intersect to create separate shapes.
What’s the easiest way to edit only one part of an SVG?
The simplest method is to ungroup the SVG multiple times until individual vector paths are isolated. Once separated, you can edit, move, or split specific parts without affecting the rest.
Will splitting vectors affect my design’s responsiveness or layout?
Not directly. However, if you’re working with auto-layout or constraints, splitting a vector won’t retain those properties, so adjustments may be needed after editing.
Can I undo a vector split if I change my mind?
Yes, you can use the Undo shortcut (Cmd/Ctrl + Z) or revert to a duplicated backup if you created one before editing.
Are there plugins that automate the splitting process?
Yes, plugins like Vector Splitter can help automate and simplify the process of breaking vector paths into segments.