

With the constant evolution of the digital world, design tools like Figma are not just for user interfaces or prototypes anymore. Now, you can use Figma to create engaging, interactive, and beautifully designed slides. Whether you’re a product designer, marketer, educator, or startup founder, Figma Slides offer a fresh, flexible alternative to traditional tools like PowerPoint or Google Slides. The best part? You don’t need to be a design expert to use them.
In this guide, you’ll learn how to use Figma Slides from start to finish. We’ll walk you through setting up your slides, designing them, and sharing them. Plus, we’ll cover some helpful tips, use cases, and plugins that can boost your workflow.
What Are Figma Slides?
Figma Slides are presentation decks created directly inside the Figma design platform. Although Figma was originally built for UI/UX design, its intuitive features, flexible canvas, and collaborative tools make it an excellent choice for building modern, visually engaging slide decks.
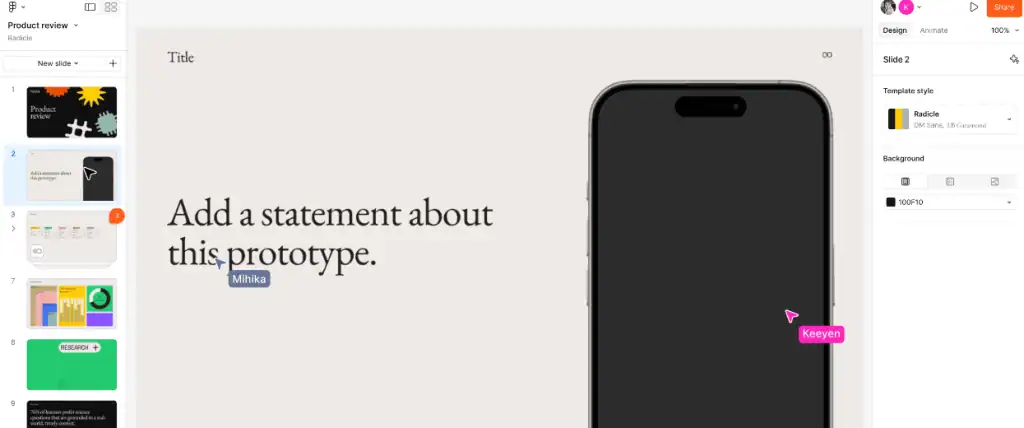
Unlike traditional slide tools, Figma gives you the freedom to design, prototype, and present all in one place. Let’s explore the key features that make Figma Slides stand out.
- Custom Slide Frames: Each slide is designed using frames, giving you full control over layout, dimensions, and style. This allows you to create presentations that perfectly reflect your brand.
- Real-Time Collaboration: Just like Google Docs, Figma enables multiple users to design and edit slides simultaneously. Comments and feedback are handled directly on the canvas, making collaboration seamless.
- Interactive Prototyping: Figma’s powerful prototyping tools let you add transitions and clickable elements to simulate real interactions. This is ideal for product demos or interactive presentations.
- Web-Based Accessibility: Because Figma is entirely cloud-based, you can access and edit your slides anywhere, from any device. There are no installations or compatibility issues.
Simple Steps: How to Use Figma for Product Design
Create a Pitch Deck in Figma and Turn it into a Web Page
From crafting eye-catching slides in Figma to seamlessly converting them into a fully responsive WordPress page, our team handles the entire process, from design to deployment.
Why Use Figma for Presentations?
If you’re used to tools like PowerPoint or Google Slides, you might ask, why switch to Figma for creating presentations?
The answer lies in the flexibility, design freedom, and collaborative power that Figma offers. It’s not just a design tool; it’s a complete presentation workspace that fits modern creative workflows.
Here are several strong reasons to consider using Figma for your next presentation:
Full Creative Control
Figma lets you design without limitations. You’re not restricted to built-in themes or fixed slide formats. For example, a startup can create a pitch deck with a unique visual identity, custom fonts, illustrations, and layout, all aligned with their branding.
Real-Time Collaboration
Multiple users can work on the same slide deck at once. Design teams, for instance, can build product demo slides while marketing adds messaging. No waiting for handoffs or file uploads.
Easy Sharing
You can share presentations via a link; there is no need to export PDFs or worry about email attachments. A project manager can instantly send a live deck link to clients for review or feedback.
Seamless Animation
With built-in prototyping, you can add transitions, animations, and interactions. For example, a UX designer can simulate a mobile app walkthrough directly in a slide, creating an interactive experience during a demo.
Cross-Platform Access
Since Figma is cloud-based, you can access your work from any device. Whether you’re on a Mac, PC, or tablet, your presentation is always up to date and ready to present.
Top Tips: Figma to WordPress Cross-Browser Compatibility
Getting Started: How to Use Figma Slides
Now that you know the benefits, let’s dive into the step-by-step process of creating slides in Figma.
Step 1: Create a New Figma File
Start by opening Figma and creating a new design file.
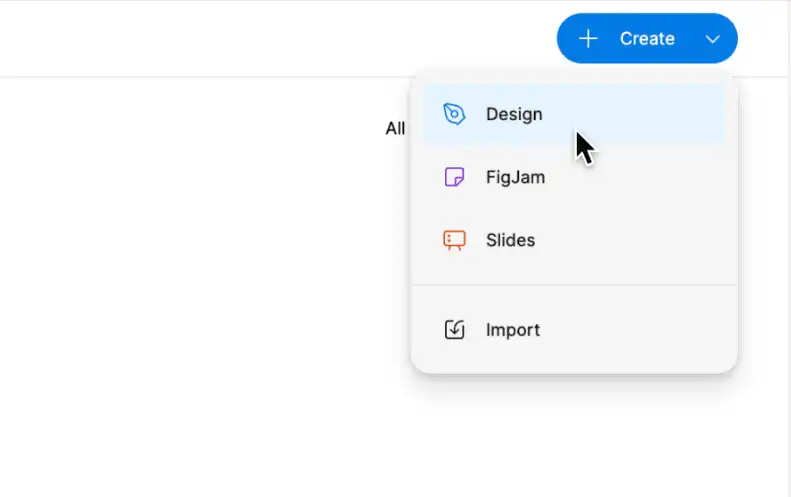
- Click on “New design file” from your dashboard.
- Rename the file (e.g., “Product Pitch Deck”).
- Set up a custom frame size to match slide dimensions (1920×1080 pixels is standard for presentations).
You can also search for pre-made templates in the Figma community.
Step 2: Set Up Your Slide Frames
Each slide in Figma is essentially a frame.

- Use the Frame Tool (F) to draw your first slide.
- Copy and paste it to create additional slides.
- Label each frame for easy organization (e.g., Slide 1: Title, Slide 2: Problem Statement).
Tip: You can create a “master slide” with consistent headers, footers, or backgrounds, and duplicate it across your deck.
Step 3: Add Text and Visuals
Now it’s time to design your content.
- Use the Text Tool (T) to insert headings, subheadings, and body text.
- Adjust font size, line height, and alignment to improve readability.
- Drag and drop images, icons, vectors, logos, and illustrations onto your frames.
Don’t forget to keep your slides visually clean and balanced. Use whitespace, and avoid cramming too much information onto a single slide.
Step 4: Apply Styles and Branding
Consistency is key for a professional presentation.
- Define your brand colors and typography using Styles.
- Save reusable components like buttons, icons, or logos in a shared library.
- Use Auto Layout to align elements evenly and responsively.
This step ensures all your slides look cohesive and on-brand.
Step 5: Add Interactive Transitions
Want to make your slides more dynamic? Use Figma’s Prototype mode:
- Switch to the “Prototype” tab.
- Connect frames using arrows to define navigation.
- Set transitions like “Instant”, “Dissolve”, or “Slide In”.
You can also add hover effects or animated elements to demonstrate product features or flows.
Step 6: Present Your Slides
When you’re ready to present:
- Click the Present button in the top-right corner.
- Use your arrow keys or mouse to navigate between slides.
- You can also generate a public or private share link to send your deck to stakeholders, clients, or team members.
Tip: Turn on “Open in presentation view” when sharing links, so viewers land directly on the first slide.
Check out: Impact of Color Theory in Figma to WordPress Conversions
Figma Slides vs Traditional Tools
When comparing Figma Slides to traditional tools like PowerPoint and Google Slides, several key differences become clear, especially in terms of design flexibility, collaboration, and interactivity.
| Feature | Figma | Google Slides | PowerPoint |
| Collaboration | Real-time, multi-user editing with comments and feedback. | Real-time editing with basic comment features. | Collaboration possible via OneDrive or SharePoint. |
| Design Flexibility | Fully customizable with no layout restrictions. | Limited to templates and basic layout controls. | Offers some flexibility, but still layout-based. |
| Prototyping | Built-in prototyping and transitions for interactivity. | No prototyping tools included. | Basic animations; advanced interactivity requires add-ons. |
| Plugins and Extensions | Rich plugin ecosystem for images, charts, icons, and more. | Limited add-ons and fewer integrations. | Some plugins available; mainly desktop-focused. |
| Accessibility | Web-based and accessible from any device. | Also web-based and cloud-synced. | Primarily desktop software with cloud as optional. |
| Learning Curve | Moderate; ideal for teams familiar with design tools. | Very easy to learn and use for general audiences. | Easy to use, especially for traditional users. |
Pro Tips for Better Figma Slides
Designing with Figma offers a high level of flexibility, but to make your presentations truly stand out, it’s important to follow a few best practices. These tips will help you improve slide clarity, maintain design consistency, and speed up your workflow.
Use Grids and Guides: Turn on layout grids to align elements precisely. This ensures a clean and structured layout. For instance, placing text and images on a consistent grid makes your slides look polished and professional.
Limit Your Fonts: Stick to a maximum of two fonts; one for headings and one for body text. This improves readability and creates a uniform visual tone across your presentation.
Use Figma Plugins for Efficiency: Figma’s plugin library can save you time and boost creativity. Some of the plugins that you can use are:
- Unsplash to add high-quality, royalty-free images.
- Icons8 to insert vector icons that match your theme.
- Content Reel will fill in the placeholder text quickly.
- Chart to create on-brand data visualizations easily.
Keep it Simple: Avoid overloading slides with information. Focus on one message per slide to help your audience stay engaged.
Save as PDF: For offline access or distribution, export your slides. Select all frames. Go to File ⟶ Export ⟶ PDF to generate a static version.
Popular Use Cases for Figma Slides
Figma Slides aren’t just for designers; they’re for anyone who needs visually compelling, collaborative, and flexible presentation tools. Thanks to its design freedom and real-time features, Figma is now widely used across industries and teams. Let’s explore some of the most common use cases.
Pitch Decks
Startups often use Figma to build custom pitch decks that stand out. For example, a fintech startup can use brand colors, interactive transitions, and high-fidelity product mockups to impress potential investors; all without needing a separate presentation tool.
Marketing Presentations
Marketing teams create slides to present campaign performance, launch strategies, or product overviews. A team might design a quarterly report that includes custom charts and on-brand visuals, making data presentations more engaging.
Internal Team Meetings
For internal use, Figma is ideal for creating roadmaps, retrospectives, or sprint updates. A product team, for instance, can prepare a weekly sync presentation directly in Figma and collaborate in real time on updates.
Product Demos
Figma’s prototyping tools allow you to build interactive product walkthroughs. A SaaS company can simulate a user onboarding flow within slides, helping sales teams demo features without switching tools.
Educational Slides
Educators and trainers design interactive lesson slides or course materials. For example, a UX instructor can create detailed slide decks with clickable examples and embedded design components to enrich the learning experience.
Find out: How to Use Figma Templates for Your Design Projects
Collaborating on Figma Slides
One of Figma’s most powerful advantages is its real-time collaboration. Unlike traditional presentation tools, Figma makes it easy for multiple people to work on the same slide deck at the same time. This is especially valuable for remote or cross-functional teams. Here’s how you can collaborate effectively on Figma Slides:
- Invite Team Members Easily: You can invite team members by email or through a shareable link. This allows designers, marketers, and stakeholders to jump in and contribute whenever needed.
- Set Custom Permissions: Figma offers permission controls so you can choose who can view, comment, or edit the file. For instance, clients can be given view-only access, while internal team members can edit slides directly.
- Leave Comments for Feedback: Instead of juggling emails or chat threads, team members can leave comments directly on slides. This streamlines the feedback process and keeps all revisions in one place.
- Use Version History: With Version History, you can track changes, compare edits, or revert to an earlier version. This ensures you never lose important work during collaboration.
Together, these features make Figma ideal for collaborative presentation creation, no matter where your team is located.
Complete Guide: How to Seamlessly Embed Figma into WordPress Site
Conclusion
Figma Slides offer a modern, collaborative, and creative way to design and present ideas. Unlike rigid presentation tools, Figma gives you total control over design, layout, animation, and branding.
Whether you’re pitching a product, teaching a concept, or showcasing your work, you can create professional, polished slides without jumping between tools. And since everything happens in the cloud, collaboration is seamless.
So, give Figma Slides a try for your next presentation. With a little practice and the right plugins, you’ll be amazed at what you can create.
FAQs About Figma Slides
Can I use Figma Slides offline?
Yes, but with limitations. Figma’s Desktop App allows you to work offline, though collaboration and syncing features require an internet connection.
Do I need to be a designer to use Figma Slides?
No, you don’t. Figma’s interface is user-friendly, and you can start with pre-made templates from the Figma Community, even if you have no design background.
Are there templates for Figma Slides?
Absolutely. The Figma Community offers a wide range of free and paid templates for presentations, pitch decks, product demos, and more.
Can I export Figma Slides as PDFs or images?
Yes. You can export selected frames or the entire deck as a PDF or PNG/JPEG images directly from the “File ⟶ Export” menu.
Is Figma safe for sharing client presentations?
Yes. Figma allows you to control access with view, comment, or edit permissions, ensuring that client presentations remain secure and professional.


