If you already use Figma for your design projects, you know how much speed and precision matter in your workflow. Beyond the standard toolbars and right-click options, Figma offers a hidden productivity booster: the Actions Menu.
The Actions Menu acts as a command palette, letting you search for and execute almost any command without digging through multiple menus. Whether you want to align elements, run plugins, or share your file, this feature saves time and keeps your focus on design.
In this tutorial, we’ll explain how to access the Actions Menu, explore its most useful commands, and share best practices that can speed up and improve your design process.
What is the Actions Menu in Figma?
The Actions Menu in Figma is a powerful command palette that lets you find and apply actions quickly. Instead of navigating through the top bar or right-click menus, you can open the Actions Menu and type the name of the command you want.
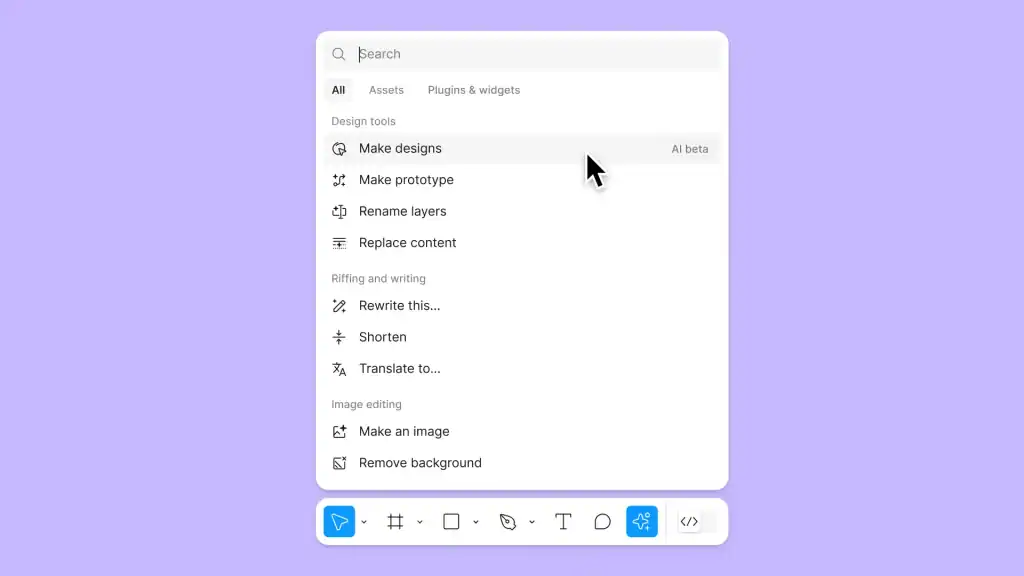
For example:
- If you want to “Group Selection,” you can type “group” in the Actions Menu.
- If you want to “Export” a frame, you can type “export” and select the command.
This feature saves time and helps you focus on design instead of searching for tools.
Simple Steps: How to Use Figma for Product Design
Why is the Actions Menu Important?
The Actions Menu in Figma is more than a convenience; it is a productivity tool that helps designers speed up their workflow and stay focused on creativity.
By reducing unnecessary clicks and offering direct access to commands, both beginners and experienced designers can work with greater efficiency. Here’s why it matters:
- Quick Access: The Actions Menu provides immediate access to commands. Instead of navigating through multiple menus, you can simply type what you need and apply it instantly. This keeps your focus on the design rather than on searching for tools.
- Fewer Clicks: It reduces the number of clicks required to perform tasks. This not only saves time but also prevents distractions that often break creative flow during design sessions.
- Keyboard-Driven Workflow: The Actions Menu works hand-in-hand with shortcuts. By combining both, you can build a keyboard-driven workflow that minimizes mouse use and speeds up repetitive actions.
- Better Productivity: As a result of the above, productivity naturally improves. You spend more time designing layouts, refining visuals, or testing interactions instead of looking for the right command in dropdown menus.
- Beginner-Friendly: The Actions Menu is a beginner-friendly feature. Even if you are not familiar with shortcuts or don’t know where a command is located, you can type a few letters, and Figma will suggest the right action.
In short, the Actions Menu ensures that designers of all skill levels can complete professional tasks quickly.
Read: How to Use Figma Templates for Your Design Projects
How to Access the Actions Menu in Figma?
The Actions Menu is designed to give you quick access to commands, and knowing how to open it is the first step. Fortunately, Figma provides multiple ways to launch the menu, so you can choose the method that fits your workflow best. Let’s look at the three main options in detail.
Using a Keyboard Shortcut
The fastest and most popular way to open the Actions Menu is through a keyboard shortcut.
- On Mac, you can press Command + /, while on Windows, you can use Ctrl + /.
As soon as you press the shortcut, the Actions Menu appears on your screen.
From there, you can begin typing the name of the command you want to execute. This method is ideal for designers who prefer working without interruptions, as it eliminates the need to use the mouse.
Learn more: How to Use Figma Components in WordPress Theme Development
Using the Top Menu Bar
Figma still offers a straightforward alternative if you cannot remember the shortcut. You can access the Actions Menu from the top menu bar. Simply click on the menu, choose Quick Actions, and start typing your command.
While this approach is slightly slower compared to the shortcut, it can be useful for beginners who are still learning their way around Figma or for situations where shortcuts are temporarily unavailable.
Using the Right-Click Menu
The third option is to open the Actions Menu directly from the right-click menu. Just right-click on the object or layer you are working on, and select Quick Actions from the list. This method is particularly handy when you are editing specific elements, as it allows you to run commands in context without moving away from your selection.
By learning all three methods, you can switch between them depending on your workflow needs and always keep the Actions Menu within easy reach.
Explore: How to Use AI Tools in Figma Design
Common Actions You Can Perform in Figma
The Actions Menu is not limited to a few shortcuts; it is a versatile feature that supports a wide range of tasks. From managing files and objects to editing text and running plugins, this menu brings nearly every command within a few keystrokes.
For beginners, learning the most common actions is the best way to unlock its full potential. Let’s go through them one by one.
File-Level Actions in Figma
To begin with, the Actions Menu helps you manage your design files quickly. You can create a new file to start fresh on a blank canvas, or choose to save and duplicate an existing file to preserve your work without overwriting it.
Another frequent task is exporting designs, such as PNG, JPG, SVG, or PDF. This is especially useful when preparing assets for developers or sharing a quick preview with stakeholders.
Example: Instead of navigating the export panel, you can simply type “export” and instantly download assets for your project.
Object-Level Figma Actions
The Actions Menu provides shortcuts for handling objects within your design. You can group and ungroup selections to organize your workspace or align and distribute multiple elements evenly across the frame.
Other useful actions include duplicating objects for quick variations and deleting layers you no longer need. These actions are particularly effective when working with multiple shapes, icons, or components.
Example: Imagine arranging several icons in a navigation bar. You can type “align horizontal” to distribute them perfectly in seconds.
Text Actions in Figma
In addition, text editing becomes much faster through the Actions Menu. You can change fonts by typing “font” and selecting from available typefaces, resize text boxes to adjust spacing, and apply text styles for consistent formatting across your project. This ensures a professional look while saving time on repetitive formatting.
Example: If you want all your headings to match, simply type the name of your saved heading style and apply it across multiple frames in one go.
Practical Guide: Role of Spatial Design System in Figma
Plugin and Widget Actions
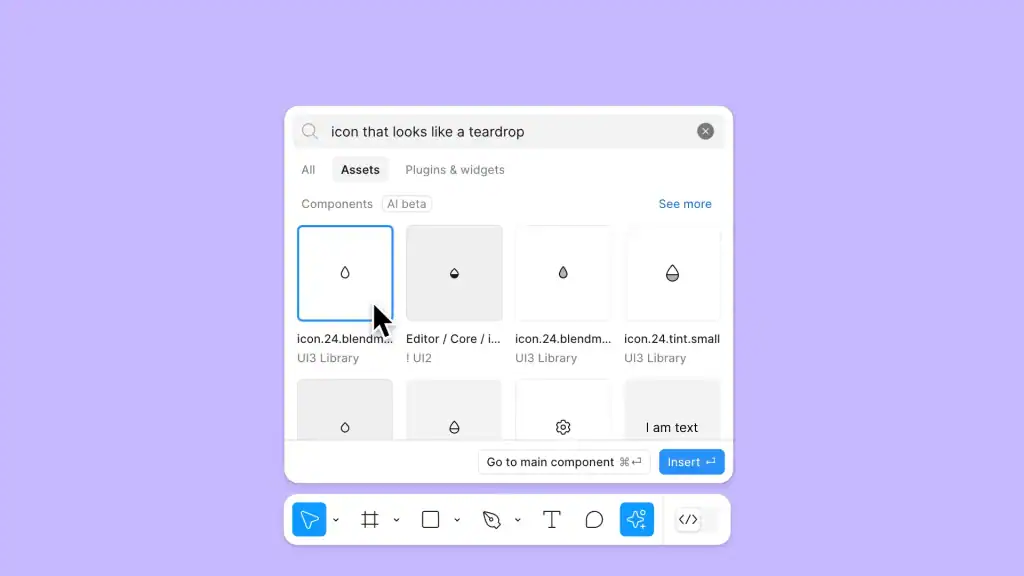
Moreover, the Actions Menu gives you direct access to plugins and widgets that expand Figma’s capabilities. You can run plugins such as Unsplash for stock images or Content Reel for placeholder text, making prototyping smoother. You can also add widgets for collaboration, sticky notes, or task tracking during workshops and design reviews.
Example: Instead of manually adding images, you can type “Unsplash,” select the plugin, and insert high-quality visuals instantly.
Collaboration and Sharing Actions
Finally, collaboration is where the Actions Menu truly shines. With just a few keystrokes, you can share your file by generating a link or inviting teammates. You can also switch to comment mode to collect feedback directly on the design or explore version history to track and restore earlier file versions. These features make teamwork seamless and ensure that everyone stays aligned.
Example: Right before a client presentation, you can type “share” and send the file link to your stakeholders without leaving your design space.
Ultimate Guide: Best Page Colors While Designing in Figma
Real-Life Use Cases of the Figma Actions Menu
While learning commands is useful, seeing how they apply in actual projects makes the value of the Actions Menu even clearer.
Designers often face repetitive tasks that can slow down progress, but with the Actions Menu, these steps become faster and smoother. Below are some real-world scenarios where it proves especially helpful.
- Wireframing: During the wireframing stage, you can quickly duplicate shapes and align them to build layout grids. This speeds up the creation of low-fidelity designs.
- UI Design: In UI design, the Actions Menu helps you apply global text styles consistently. Instead of manually editing each text layer, you can enforce a professional and unified look with just a few commands.
- Prototyping: When building prototypes, you can add interactions without browsing through multiple tabs. This allows you to focus on the flow rather than navigating menus.
- Asset Export: Exporting becomes much easier. You can export multiple screens at once, saving time when preparing deliverables for developers.
- Team Collaboration: You can keep feedback loops short and efficient by switching to comment mode or quickly generating a share link.
Complete List: Top AI Design Trends Revolutionizing UI UX
Troubleshooting the Actions Menu Issues in Figma Design
Even though the Actions Menu is simple to use, beginners may occasionally encounter small issues. These problems are usually easy to solve once you know what to look for. Below are the most common challenges and how to fix them.
- Action Not Appearing: If an action does not show up in the menu, check whether you have selected the correct object. Some commands only become available when specific elements, such as text boxes, shapes, or frames, are highlighted. Ensuring you have the right selection often resolves this issue.
- Shortcut Not Working: If the keyboard shortcut fails to open the Actions Menu, verify that your keyboard language and layout match Figma’s settings. Sometimes a mismatch prevents the command from working correctly. If the problem continues, restarting the Figma app usually restores functionality.
- Plugins Not Showing: When plugins are missing from the Actions Menu, make sure they are properly installed. If the installation is correct but the issue persists, refresh the browser or restart the desktop app. This usually reloads the plugins and makes them available again.
Best Practices: Migrating to Figma Design System
Expert Tips to Master the Actions Menu
Once you are comfortable with the basics, the next step is to refine your workflow with advanced techniques.
By using the Actions Menu strategically, you can save even more time and create a smoother design process. Here are some expert tips to take your skills further.
- Use Actions Menu with Autocomplete: Take advantage of Figma’s autocomplete feature. Simply type a few letters, and the Actions Menu will suggest matching commands. This helps you locate the right action quickly without typing the full name.
- Customize Toolbar and Shortcuts: Pair the Actions Menu with customized shortcuts and toolbar adjustments. Using both together creates a faster workflow, giving you direct access to commands you use most often.
- Practice with Real Projects: The best way to master the Actions Menu is through hands-on practice. Apply it while working on real client projects or personal design tasks. The more you use it, the more natural it becomes.
- Stay Updated: Remember that Figma is always improving. By keeping an eye on release notes and updates, you can discover new features added to the Actions Menu and integrate them into your workflow.
Quick Steps: How to Create a Project Front Page Design with Figma
Conclusion
The Actions Menu in Figma is a simple yet powerful feature. It allows you to find, apply, and run commands quickly. Beginners can use it to perform basic actions like grouping, aligning, or exporting. Over time, you can integrate plugins, run advanced tasks, and collaborate more effectively.
By practicing with the Actions Menu, you will spend less time searching for tools and more time designing. This makes your workflow efficient and professional, even if you are just starting out with Figma.
FAQs About Figma Actions Menu
Is the Actions Menu useful for beginners in Figma?
Yes, the Actions Menu is very beginner-friendly because it eliminates the need to remember all shortcuts or search through complex menus. Beginners can simply type a few letters to find the command they need.
Does the Actions Menu work the same on Mac and Windows?
The Actions Menu works the same across both systems, but the shortcut to open it differs. On Mac, you use Command + /, while on Windows, you use Ctrl + /.
Can I customize the Actions Menu in Figma?
While you cannot directly customize the Actions Menu itself, you can combine it with customized shortcuts and toolbar preferences. This makes it easier to access frequently used commands quickly.
How does the Actions Menu improve collaboration in Figma?
The Actions Menu makes collaboration easier by allowing you to instantly share files, switch to comment mode, or review version history. This keeps feedback loops short and helps teams stay aligned.
Do plugins need to be installed separately to appear in the Actions Menu?
Yes, plugins must be installed before they appear in the Actions Menu. Once installed, you can launch them instantly by typing their names into the menu.